Why Proper Attic Ventilation is Critical for Your Home
Attic ventilation installation is one of the most overlooked yet essential aspects of maintaining a healthy, energy-efficient, and structurally sound home. Without a properly designed system for airflow, your attic becomes a sealed container, trapping superheated air in the summer and moisture-laden air in the winter. This leads to a cascade of problems, including sky-high energy bills, premature roof failure, compromised indoor air quality, and potential structural damage. For homeowners seeking the best ways to protect their most significant investment, understanding the fundamentals of attic ventilation is the critical first step. As leading roofing experts in the Houston area, we’ve seen how a professionally installed, well-ventilated attic can transform a home’s performance and longevity.
Quick Guide to Attic Ventilation Installation:
- Calculate your needs – Use the industry-standard 1/300 rule (1 sq ft of ventilation per 300 sq ft of attic floor space).
- Balance intake and exhaust – Ensure a 50/50 split between low intake vents (soffits) and high exhaust vents (ridge/static).
- Choose the right vents – Soffit vents for intake and ridge vents for exhaust are the most effective combination for passive systems.
- Install properly – This involves precise cutting, secure fastening, and ensuring clear, unobstructed airflow paths from intake to exhaust.
- Maintain regularly – Perform annual checks to clean debris, inspect for blockages, and ensure the system functions as designed.
The stakes are particularly high in the demanding climate of Texas, where summer attic temperatures can soar beyond 150°F. This extreme radiant heat doesn’t just make your air conditioner work overtime; it literally cooks your asphalt shingles from the inside out, causing them to lose their protective granules and become brittle. Simultaneously, moisture buildup from humidity and daily household activities can condense on the underside of the roof deck, leading to wood rot, delamination of the sheathing, and a perfect breeding ground for mold. A well-ventilated attic can extend your roof’s lifespan by years and has been shown to cut cooling costs by up to 30% by mitigating this heat transfer.
I’m Andre Castro, CEO of Sienna Roofing. My hands-on approach to every attic ventilation installation project has reinforced my belief that proper ventilation is not just a feature—it’s the key to changing homes from energy-wasting money pits into comfortable, efficient, and healthy living spaces.

Why Your Attic Needs to Breathe: Signs & Benefits of Proper Ventilation
Think of your attic as your home’s lungs—it must inhale fresh air and exhale stale, damaging air to keep the entire structure healthy. Without this constant, balanced airflow, your attic becomes a breeding ground for problems that can cost you thousands in repairs, remediation, and unnecessarily high energy bills. In fact, building science experts agree that inadequate ventilation is a leading cause of premature roof failure, yet it’s one of the most preventable issues with a proper attic ventilation installation.
In the humid Texas climate, an unventilated attic can easily reach 150°F or higher, creating an oven-like environment that cooks your roof from the inside out. Your home often sends out clear distress signals when it’s struggling to breathe.
Telltale Signs of an Under-Ventilated Attic
- Excessive heat in upper floors: If your upstairs rooms feel noticeably warmer or stuffy, it’s a classic sign of trapped attic heat radiating down through your ceiling insulation. This forces your AC to run longer and harder, straining the compressor and increasing wear and tear.
- Damp or wet insulation: Touch your attic insulation (with gloves on). If it feels damp or compressed, it’s a dead giveaway that moisture is condensing and getting trapped. Wet insulation loses its R-value, rendering it ineffective and creating a pathway for heat transfer, which drives up energy costs.
- Dark stains on wood: Black or gray stains on the rafters or the underside of the roof deck are not just discoloration; they are visible signs of mold or mildew growth. This fungal growth, fueled by persistent moisture, can weaken your roof’s structural integrity over time and release spores into your home’s air.
- Frost on the roof deck in winter: During cold snaps, warm, moist air from your living space (from cooking, showers, and even breathing) rises into the attic. If it can’t escape, it will condense and freeze on the cold surfaces of the roof deck and nails, a phenomenon known as “attic frost.”
- Ice dams at the eaves: While less common in most of Texas, ice dams can occur during rare winter storms. Trapped attic heat melts snow on the upper parts of the roof. The water runs down and refreezes at the colder eaves, creating a dam that forces water back up under the shingles and into your home.
- Peeling paint: Excess moisture and heat in the attic can migrate through the ceiling and into your walls, causing interior and exterior paint to blister, peel, or crack. This is often a cosmetic symptom of a much larger ventilation problem.
The Year-Round Advantages of a Well-Ventilated Attic
Proper ventilation isn’t just about preventing problems; it actively improves your home’s performance and durability. For homeowners considering an upgrade to their residential roofing, integrating a properly designed ventilation system is the single best way to protect that investment and ensure its longevity.
In the summer, a well-ventilated attic continuously expels superheated air. This dramatically reduces the thermal load on your home, potentially cutting cooling costs by 20-30%. It also protects your asphalt shingles from being baked from below, which prevents them from cracking, curling, and losing their protective granules years ahead of schedule. Many shingle manufacturer warranties are even voided if the attic lacks proper ventilation.
In the winter, ventilation is just as critical. It allows the humid air generated inside your home to escape before it has a chance to condense on cold surfaces. This simple process is your home’s primary defense against the wood rot, mold growth, and insulation damage that can compromise your roof’s structure from within. A breathing attic means lower utility costs, a longer roof lifespan, and a healthier, more comfortable home all year long.
The Anatomy of Airflow: A Breakdown of Attic Vent Types
Effective attic ventilation installation is all about creating a balanced, passive system that uses the natural laws of physics to its advantage. The primary goal is to generate a continuous “chimney effect” (or thermal buoyancy), where cool, fresh, denser air is drawn in at the lowest point of the attic, and hot, moist, lighter air is exhausted at the highest point. This is achieved through a carefully calculated combination of intake and exhaust vents.

Ventilation systems can be passive, relying entirely on natural convection (the principle that hot air rises) and wind pressure, or active, using electric or solar-powered fans to mechanically force air movement. The magic of a high-performing system happens when these components are chosen correctly and work together as a balanced team.
Intake Vents: Where Fresh Air Enters
Intake vents are always located at the lowest points of the roof structure, typically at the eaves, to draw in cooler, denser air from outside.
- Soffit Vents: Considered the gold standard for intake ventilation. They are installed in the soffit (the underside of your roof’s overhang) and come in various forms, including continuous strips or individual rectangular units. Pros: Provide the most effective, evenly distributed intake airflow. Cons: Can be blocked by insulation if baffles aren’t used; can be clogged by paint, dust, or debris.
- Under-Eave and Drip Edge Vents: These are useful alternatives for homes with little to no soffit space. They are installed at the edge of the roofline to allow air in.
- Gable Vents: These are the louvered vents found on the exterior walls at the peak of the gables. While traditionally used for ventilation, they are less effective at creating the ideal bottom-to-top airflow and are often a source of imbalance when mixed with other vent types.
Exhaust Vents: Letting the Hot Air Out
Exhaust vents are placed at or very near the highest point of the roof to give superheated, moisture-laden air an easy escape route.
- Ridge Vents: The most effective passive exhaust option. A ridge vent is installed along the entire peak of the roof, allowing hot air to escape uniformly from the highest point. Pros: Highly efficient, low profile, and provides even ventilation across the entire attic. Cons: Requires precise installation to prevent leaks; not suitable for all roof designs (e.g., those with no ridge).
- Static Vents (Box Vents): These are individual, non-mechanical vents installed on the roof plane near the ridge. Pros: Inexpensive and relatively easy to install. Cons: Less efficient than a continuous ridge vent; multiple units are needed to achieve adequate ventilation, which can lead to more roof penetrations.
- Turbine Vents (Whirlybirds): These are wind-powered vents that use spinning vanes to actively pull hot air from the attic. Pros: More effective than static vents, especially in windy areas. Cons: Have moving parts that can wear out or become noisy; effectiveness drops to zero on calm days.
- Powered Attic Fans: These fans use electricity or solar power to forcibly exhaust hot air and are typically controlled by a thermostat. Pros: Move large volumes of air quickly. Cons: Can use electricity (unless solar), can be noisy, and critically, can create negative pressure if intake is insufficient, pulling conditioned air from your home.
Watch this helpful video to learn about attic vent options
The Problem with Mixing Exhaust Vents
Thinking “more is better” is a common and costly mistake in attic ventilation. Mixing different types of exhaust vents—for example, having a ridge vent and a powered fan, or gable vents and static vents—causes the system to short-circuit. Air, like water, follows the path of least resistance. A powerful fan or a high-up ridge vent will pull its makeup air from the closest and easiest source, which is often the other, weaker exhaust vent (like a gable vent) instead of the low-lying soffit vents. This disrupts the intended bottom-to-top airflow, leaving large sections of your attic stagnant and unventilated. As experts at Radiant Barrier Guru point out, the best approach is to select one primary exhaust method (ideally a ridge vent) and pair it with ample, balanced intake ventilation.
How to Calculate and Plan Your Attic Ventilation Installation
Before a single hole is cut or a vent is purchased, a successful attic ventilation installation begins with a careful plan based on solid calculations. This isn’t guesswork; it’s a process rooted in building science to ensure your system is sized correctly and will perform effectively. An undersized system will be ineffective, while an imbalanced one can create more problems than it solves.

Step 1: Calculate Your Attic’s Square Footage
First, you need to determine the total area of your attic floor. For a simple rectangular attic, multiply the length by the width to get the total square footage. For more complex, L-shaped attics, break the area down into smaller rectangles, calculate the area of each one, and then add them together. This number is the foundation for your entire ventilation plan.
Step 2: Apply the 1/300 Rule for Ventilation
The Federal Housing Authority (FHA) and most building codes use the 1/300 rule as the minimum standard for attic ventilation. The rule is simple:
- You need 1 square foot of total ventilation for every 300 square feet of attic floor space.
This calculation gives you the total Net Free Area (NFA) required. NFA is the actual open area of a vent that allows air to pass through, after accounting for screens, louvers, and frames. This value is always smaller than the vent’s physical dimensions and should be printed on the vent’s packaging or spec sheet.
Important Exception: The 1/150 Rule
If your attic does not have a vapor barrier on the attic floor (the warm-in-winter side of the insulation), the requirement doubles to the 1/150 rule: 1 square foot of ventilation for every 150 square feet of attic floor. A vapor barrier is typically a plastic or foil sheet installed to stop moisture from moving from the living space into the attic. Many older Texas homes lack one, making the stricter 1/150 rule the more appropriate and safer standard to follow.
For a more detailed analysis, you can use online tools like this ventilation calculator.
Step 3: Balance the System and Adjust for Roof Slope
The most critical part of planning is achieving a 50/50 balance between intake (low vents) and exhaust (high vents). Take your total required NFA from Step 2 and divide it by two. Half of your ventilation must come from intake vents (e.g., soffits), and the other half must come from exhaust vents (e.g., a ridge vent).
-
Example Calculation: For a 1,800 sq ft attic with no vapor barrier:
- Rule: Use the 1/150 rule.
- Total NFA: 1,800 sq ft / 150 = 12 sq ft of total ventilation needed.
- Balance: You need 6 sq ft of NFA for intake and 6 sq ft of NFA for exhaust.
-
Pro Tip: It is always better to have slightly more intake NFA than exhaust NFA. As noted by home maintenance experts at House Logic, this creates a pressurized system that prevents exhaust vents from pulling conditioned air from your living space through ceiling penetrations.
-
Steep Roofs: A steeper roof encloses a larger volume of air, which requires more ventilation. For roofs with a pitch greater than 6:12, you should increase your calculated total NFA:
- 7:12 to 10:12 pitch: Increase total NFA by 20%.
- 11:12 pitch or greater: Increase total NFA by 30%.
Step-by-Step Guide to Installing Common Attic Vents
While a DIY attic ventilation installation can be a rewarding project for an experienced homeowner, working on a roof is inherently dangerous and requires a serious commitment to safety and precision. Before you begin, honestly assess your comfort level with heights, your experience with power tools, and the risks involved. When in doubt, hiring a professional is always the safest and most effective option.

Safety First!
According to the CDC, over 500,000 people are treated for ladder-related injuries annually in the U.S. To avoid becoming a statistic, always follow these essential safety precautions:
- Ladder Safety: Place your ladder on firm, level ground. Ensure it extends at least three feet above the roofline. Always maintain three points of contact (two feet and one hand, or one foot and two hands) when climbing or descending.
- Protective Gear: Wear sturdy, rubber-soled shoes for maximum grip. Use work gloves to protect your hands and safety glasses to shield your eyes from debris. For any roof with a noticeable pitch, a personal fall arrest system (safety harness) is essential.
- Weather Conditions: Never work on a roof in wet, icy, or windy conditions. Even a small amount of morning dew can make a roof surface dangerously slick.
- Manufacturer Instructions: The vent manufacturer’s installation instructions are not just suggestions. Follow them precisely to ensure a proper fit and a watertight seal.
Key Steps for Soffit Vent Installation (Intake)
Soffit vents provide the critical fresh air intake for your system. Precision here ensures the entire system works.

- Mark and Cut: From below the eave, use a chalk line to mark the rectangular opening for the vent on the soffit panel. Set your circular saw blade depth to cut only through the soffit material (typically 1/4″ to 1/2″) without hitting the framing behind it.
- Install Vent: Place the vent over the cutout, ensuring it’s centered. Secure it firmly to the soffit using corrosion-resistant sheet metal screws.
- Clear Insulation: Go into the attic. Find the newly installed vent and pull back any insulation that is covering or blocking it. The opening must be completely clear.
- Install Baffles (Crucial Step): A baffle (also called a rafter vent or insulation stop) is a plastic or foam channel. Staple it directly to the roof deck in each rafter bay where a soffit vent is present. This creates a dedicated air channel, preventing insulation from shifting and blocking the airflow path. As experts at Professional Roofing magazine emphasize, a soffit vent without a baffle is effectively useless.
How to Install a Ridge Vent (Exhaust)
A ridge vent provides the most efficient, uniform exhaust along the highest point of the roof.
- Remove Ridge Caps: Using a flat pry bar, carefully remove the existing ridge cap shingles, trying not to damage the shingles on the main roof plane.
- Cut Sheathing Slot: Snap chalk lines on both sides of the ridge peak, typically 1 to 1.5 inches down from the center. Set your circular saw blade to the thickness of the roof sheathing (usually 1/2″ or 5/8″). Cut along the chalk lines to create a continuous slot. Crucially, do not cut into the ridge board or the roof trusses.
- Install Vent: Roll out or place the ridge vent sections, starting at the end of the roof that faces the prevailing winds. Secure the vent according to the manufacturer’s specific nailing pattern.
- Seal and Finish: Seal the ends of the ridge vent with the provided end caps or roofing cement. Install new ridge cap shingles over the entire length of the vent, using nails long enough to penetrate the vent and the roof sheathing. Fine Homebuilding offers excellent detailed visual guidance for this process.
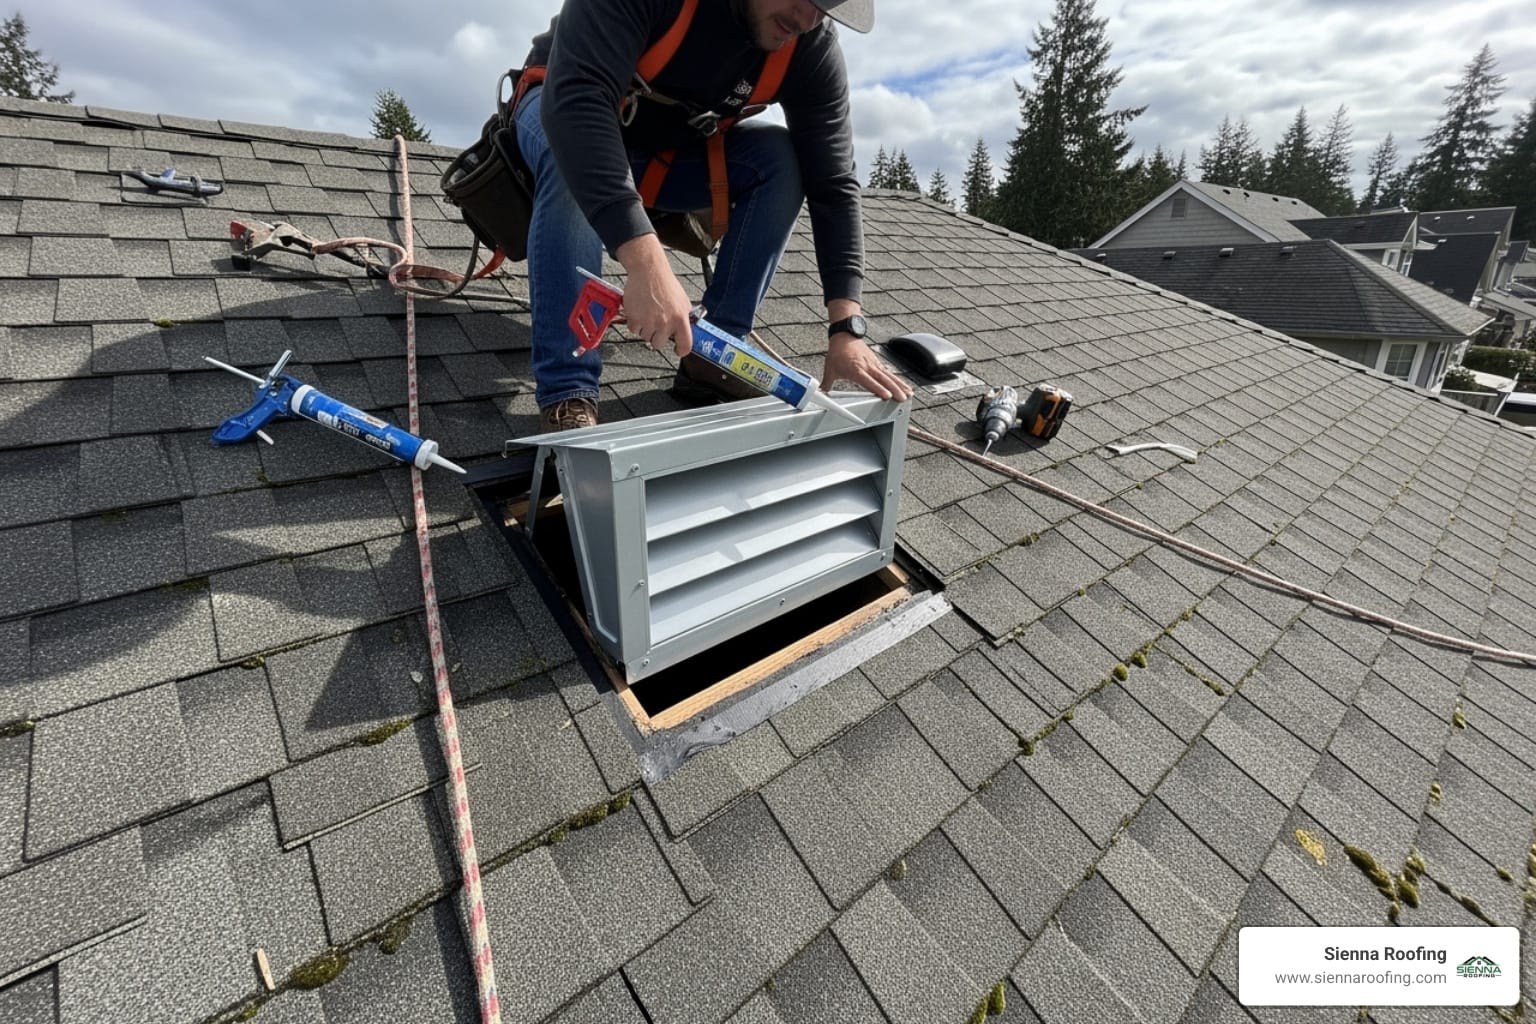
Installing Static (Box) Vents (Exhaust)
Static vents are individual exhaust units placed near the ridge, suitable for roofs where a ridge vent isn’t feasible.
- Mark Location: From inside the attic, choose a location for the vent high on the roof, at least 18-24 inches down from the ridge. Drive a nail up through the roof sheathing to mark the center of the desired location.
- Cut Hole: From the rooftop, use the nail as a guide. Use the vent’s base or a template to trace the opening, then cut the hole with a saber saw or jigsaw.
- Install Vent: Liberally apply roofing cement to the underside of the vent’s flange. Carefully slide the top edge of the vent under the shingles above the hole. The bottom edge of the flange should lie on top of the shingles below the hole.
- Nail and Seal: Secure the flange to the roof deck with galvanized roofing nails, nailing on the sides and bottom flange. Do not nail through the top flange. Cover all exposed nail heads with a generous dab of roofing cement to prevent leaks. Always review specific instructions from manufacturers like Air Vent before starting.
Keeping Your Cool: Maintenance and Professional Help
Your attic ventilation installation is a dynamic system that requires simple, regular maintenance to ensure it continues to perform optimally and protect your home for years to come. Think of it like changing the filter in your HVAC system; neglecting it can lead to reduced performance and potential damage. A few minutes of inspection each year can save you from costly repairs down the road.
DIY Maintenance Checklist (Annual Inspection)
Perform these checks each spring or fall to keep your system breathing freely:
- Clean Soffit Vents: From the ground, use a leaf blower, compressed air, or a stiff brush to clear away dust, pollen, leaves, spider webs, and other debris that can clog the screens of your intake vents.
- Check Exhaust Vents: Visually inspect your ridge, static, or turbine vents from the ground using binoculars. Look for any visible blockages like leaves, debris, or animal nests. For turbine vents, ensure they spin freely in a light breeze.
- Inspect Baffles from Inside: Go into your attic on a cool day. Look at the area above your soffit vents to ensure insulation (especially blown-in types) has not shifted and blocked the baffles. The air channel from the soffit to the attic must remain clear.
- Look for Pests: Check that all vent screens are intact and securely in place. Look for signs of birds, squirrels, rodents, or insects that may have decided to make a home in your vents, as they can create significant blockages.
- Verify Powered Fans: If you have electric or solar-powered fans, check them on a hot day to ensure the thermostat is triggering them to operate correctly. Listen for any unusual grinding or squealing noises that might indicate failing bearings.
- Check for Leaks: After a heavy rain, inspect the attic area around all vent penetrations for any signs of water staining, dampness, or active leaks.
When to Call a Professional
While DIY maintenance is straightforward, some situations absolutely require the expertise of a qualified roofing professional:
- Complex Roofs: Homes with multiple hips, valleys, dormers, and intersecting rooflines have complex airflow patterns. A professional can properly design a system that ventilates all attic areas without short-circuiting.
- Finding Moisture or Mold: If you find significant moisture damage, wet insulation, or visible mold growth, call a professional immediately. They can diagnose the root cause—which may be more complex than just ventilation—and recommend a safe remediation plan.
- During a Roof Replacement: This is the absolute best time to have a perfectly integrated ventilation system designed and installed by your roofing contractor. They can ensure all components work together seamlessly with your new roof.
- Safety Concerns: If you are not completely comfortable working on a ladder or a sloped roof, or if you lack the proper safety equipment, hiring a pro is the smartest and safest choice.
- Electrical Work: All wiring for powered attic vents should be handled by a qualified electrician or a roofing professional certified to do so.
Sienna Roofing: Your Local Ventilation Experts
For a professional attic ventilation installation, you need a team that understands the unique challenges of the Texas climate. At Sienna Roofing, we specialize in creating balanced, efficient ventilation systems designed to maximize performance and longevity for homeowners across the Houston area.
- Name: Sienna Roofing
- Address: 17034 University Blvd, Sugar Land, TX 77479
- Phone: (832) 564-3322
- Map:
Frequently Asked Questions about Attic Ventilation
After completing hundreds of attic ventilation installation projects, we’ve heard the same excellent questions from many Houston-area homeowners. Getting clear, accurate answers is key to making an informed decision about your home. Here are the answers to the most common queries.
Can you have too much attic ventilation?
It’s nearly impossible to have too much passive ventilation (like soffit and ridge vents), provided it is balanced. The real danger isn’t the quantity of ventilation, but the balance between intake and exhaust. The most common and damaging mistake is having too much exhaust ventilation without enough intake to feed it. This creates a state of negative pressure, where the powerful exhaust vents, starved for air, begin to pull it from the easiest source: your living space. This pulls expensive conditioned air up through ceiling cracks and light fixtures, increasing your energy bills and potentially drawing combustion gases from your appliances in a phenomenon called back-drafting. If you’re going to err, it’s always better to have slightly more intake NFA than exhaust NFA.
Should I close my attic vents in the winter?
Absolutely not. This is a persistent and dangerous myth that can lead to thousands of dollars in structural damage. Winter ventilation is arguably just as crucial as summer ventilation. Its primary job in winter is to remove the moisture created by daily household activities like cooking, showering, and laundry. Closing your vents traps this warm, humid air in the attic. As it hits the cold underside of the roof deck, it condenses, leading to saturated insulation, rampant mold growth on your roof’s wood structure, and potential ice dams. Your attic must breathe year-round to stay dry and healthy.
Do solar attic fans work?
Yes, solar attic fans can be very effective, especially in a sunny climate like Texas, as they actively pull hot air out of the attic without adding to your electric bill. However, they come with a critical requirement: they must be paired with adequate intake ventilation. A powerful solar fan without enough soffit vents to supply fresh air will create strong negative pressure and pull conditioned air from inside your house, defeating the purpose of energy savings. When installed as a supplemental part of a well-balanced passive system, a solar fan can be an excellent tool for boosting airflow on the hottest, stillest days.
How much does professional attic ventilation installation cost?
The cost can vary widely based on the size of your attic, the type of vents being installed, the complexity of your roof, and whether any existing vents need to be removed or repaired. For a straightforward installation of soffit and ridge vents on a typical single-story home, you might expect to pay between $500 and $1,500. For larger homes, complex roofs, or the installation of powered vents, the cost can range from $1,500 to $3,000 or more. The best approach is to get a detailed quote from a reputable roofing contractor.
Will installing new vents void my roof warranty?
If installed correctly by a qualified and insured roofing professional, adding proper ventilation will not void your shingle manufacturer’s warranty. In fact, most shingle warranties require that the roof have adequate ventilation that meets building codes. However, a DIY installation that is done improperly and leads to leaks or other damage could certainly jeopardize your warranty coverage. This is another strong reason to entrust the job to an experienced professional.
Conclusion
Proper attic ventilation installation is the unsung hero of home maintenance, a fundamental investment that actively protects your home’s structure while saving you significant money over the long term. By creating a balanced system that harnesses the simple power of the “chimney effect”—where cool, fresh air enters low and hot, moist air exits high—you can dramatically extend your roof’s lifespan, prevent costly moisture and mold damage, and slash your summer cooling costs by up to 30%.
This passive, continuous airflow works silently, 24/7, to defend your home from the dual threats of brutal Texas heat and pervasive humidity. While installing a few basic vents can be a rewarding DIY project for some, the precision required for a truly effective, balanced, and leak-free system often calls for professional expertise. There is no shame in calling a professional, especially when dealing with complex rooflines or legitimate safety concerns—in fact, it’s the smartest choice a homeowner can make to guarantee the job is done right the first time.
The investment in a professional ventilation system pays for itself through lower energy bills, the avoidance of major structural repairs, a longer-lasting roof, and a more comfortable indoor environment. If you’re in Missouri City or the greater Houston area and want the peace of mind that comes with an expert installation, reach out to a trusted local roofer who intimately understands our unique climate. A professional evaluation is the first step toward ensuring your home gets the vital protection it deserves.