Cement flat roof solution in 2020: Best Protection
The Ultimate Guide to Protecting Your Cement Flat Roof
Flat concrete roofs offer a sleek, modern aesthetic, but their horizontal design makes them uniquely vulnerable to water intrusion. For homeowners, understanding how to protect these surfaces is crucial for preventing costly water damage, mold growth, and structural issues. At Sienna Roofing, we provide expert roofing services to ensure your home is protected. While the search for a reliable cement flat roof solution in 2020 highlighted key challenges, the principles of effective protection have only been refined since. If you’re looking for a quick answer, here’s what works today:
Top Solutions for Protecting Concrete Flat Roofs:
- Repair physical cracks first using hydraulic cement with built-in sealers that expand into gaps.
- Apply an impregnating silicone polymer sealer in two coats to waterproof the entire surface.
- Consider liquid-applied membrane systems (silicone or polyurethane) for maximum protection.
- Use cool roof coatings to reflect sunlight and reduce energy costs by 15-35%.
The two-step process is critical: you can’t seal over cracks, and you can’t leave pores untreated. Both issues must be addressed for a complete solution.

Flat concrete roofs are popular for their clean, modern look and space-efficient design. But their horizontal surface makes them uniquely vulnerable to water damage. Without proper protection, moisture can penetrate through microscopic pores or visible cracks, leading to leaks, mold growth, and serious structural issues.
The good news? With the right approach, you can turn your flat concrete roof into a durable, leak-free asset. The key is understanding the two different ways water invades concrete—and addressing both with proven roof leak repair techniques.
This guide breaks down everything you need to know: from identifying the source of leaks to choosing between DIY sealers and professional-grade membrane systems. You’ll learn the exact steps contractors use to waterproof concrete roofs, what products deliver the best results, and when to call in an expert.
As Andre Castro, CEO of Sienna Roofing, I’ve overseen countless flat roof projects throughout the Houston Metro area. My hands-on experience with Texas’s intense UV exposure and heavy rains has shown me exactly what works—and what fails—when protecting concrete roofs. The proven strategies that were effective then are even more critical now. Let’s explore the modern solutions that will keep your flat roof dry and durable for years to come.

Understanding the Enemy: Why Concrete Roofs Leak
Your concrete flat roof faces two distinct enemies, and understanding the difference between them is the first step toward effective protection.
The invisible threat comes from microscopic intrusion. Think of your concrete as having thousands of tiny, invisible pathways—pores and capillaries that run throughout the material. When left unsealed, these microscopic channels act like sponges, pulling water deep into the concrete through a process called capillary action. This isn’t just surface moisture; it’s water being actively drawn into the material’s structure.
The problem gets worse when water pools on your roof. Here in the Sugar Land, Missouri City, and Richmond areas, even a brief afternoon thunderstorm can leave standing water on a flat surface. That ponding water doesn’t just sit there—it’s constantly working its way into those pores. Over time, this relentless moisture saturation weakens the concrete from within, eventually leading to leaks and material degradation you can’t see until it’s too late.
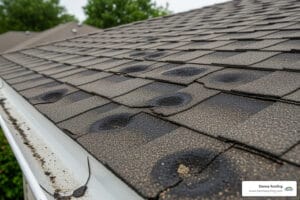
The visible threat is easier to spot but just as dangerous. Physical cracks from settling, thermal expansion, or impact damage create direct highways for water to enter your home. Our Texas climate is particularly hard on concrete roofs—the dramatic temperature swings between scorching summer days and cool nights cause the material to expand and contract repeatedly. Add in the natural settling of your home’s foundation, and you’ve got a recipe for stress fractures.
These environmental stressors are often compounded by issues from the initial construction. Poor installation practices are a leading cause of premature roof failure. This can include an improperly formulated concrete mix, a lack of adequate slope (even “flat” roofs should have a slight pitch to direct water to drains), or the absence of properly installed expansion joints. These joints are critical for allowing the concrete slab to expand and contract without creating stress fractures. When these fundamentals are overlooked, the roof is set up for failure from day one. The consequences of this water intrusion extend far beyond a simple drip. As moisture saturates the concrete, it can reach the steel rebar used for reinforcement, leading to rebar corrosion. The rusting steel expands, causing the surrounding concrete to crack and break away in a process called spalling. This is not just cosmetic; it’s a direct threat to the roof’s structural integrity. Furthermore, persistent dampness creates a breeding ground for mold, which can compromise indoor air quality and pose health risks, while also damaging interior insulation, drywall, and electrical systems.

The ongoing search for the best cement flat roof solution in 2020 and beyond brought renewed attention to these challenges. Industry articles highlighted how rain and moisture permeate through pores and capillaries, or seep through grout and mortar between bricks or pavers on flat surfaces. Even academic research, including findings from the XV International Conference on Durability of Building Materials and Components (DBMC 2020), confirmed what roofing professionals have long known: protecting flat roofs from environmental degradation requires addressing both microscopic and macroscopic failure modes, a principle well-established in building science.
The good news? Once you understand these two distinct types of water intrusion, you can tackle each one with the right approach. But here’s the critical point: you can’t fix one without addressing the other. Sealing microscopic pores won’t help if visible cracks are channeling water directly into your home. And filling cracks won’t stop moisture from wicking through unsealed pores.
Once you identify a leak, taking immediate action prevents further water damage, mold growth, and the kind of expensive repairs that can derail your budget. The two-step solution we’ll cover next addresses both failure modes systematically, giving your roof complete protection from Texas weather.
The Two-Step Solution: Repair First, Then Seal
When it comes to waterproofing your concrete roof, you can’t just slap on a coat of sealer and call it a day. The most effective approach is a smart, two-step process. This method tackles both types of water intrusion we discussed earlier: those tiny, invisible pores and the more obvious physical cracks. It’s crucial to treat these two problems differently. Think of it this way: you wouldn’t try to fix a leaky boat by simply painting over the holes. You need to patch those holes first, and then you can apply a protective coating to the entire surface. This methodical strategy ensures every potential weak spot is addressed, creating a truly long-lasting and reliable waterproofing system for your home.
Step 1: Addressing Physical Cracks and Damage
Before we even think about waterproofing, the first step is to diligently inspect and repair all visible cracks, gaps, and damaged areas. These are the “holes in the boat” that need immediate attention. For this, we use a special hydraulic cement-based repair compound. What makes this material so effective? It’s designed to expand as it cures. This expansion actively pushes the compound into every tiny void of the crack, creating a permanent, watertight plug. This ensures water can’t find a sneaky way through. Plus, many of these compounds even have a built-in sealer, offering immediate, robust protection.
But a great product is only as good as its application! Proper surface preparation is absolutely essential. This means cleaning the crack thoroughly, removing any dust, debris, or loose concrete. If you skip this step, the repair material won’t bond correctly, and your efforts will literally crumble away.
Step 2: Waterproofing the Entire Surface with a Sealer
Once all those physical repairs have fully cured and settled (patience is key here!), it’s time for the second step: waterproofing the entire roof surface against moisture penetrating its pores. For this, our go-to solution is an impregnating silicone polymer sealer. This isn’t just a coating that sits on top of your concrete like paint. Instead, it works its magic by penetrating deep into the concrete. It creates a chemical bond within the material itself, forming a hydrophobic (water-repelling) barrier from the inside out.
The benefits of this deep-penetrating sealer are fantastic. It makes the surface highly water-repellent without changing its appearance or making it slippery, which is super important for safety on a flat roof. It also allows the concrete to “breathe” by remaining water vapor permeable. This means moisture won’t get trapped underneath, preventing further hidden damage. This deep protection is what effectively stops leaks caused by capillary action, making it a vital part of any comprehensive cement flat roof solution in 2020 and for years to come.
A Practical Guide to Waterproofing Your Concrete Roof
While the principles of concrete protection are timeless, the technology available continues to improve. Following a systematic application process is key to achieving a durable, long-lasting result that stands up to modern standards and harsh weather conditions, especially in our challenging Texas climate.
The methods that defined a quality cement flat roof solution in 2020 have been refined and remain the gold standard for durability today. Whether you’re tackling this as a DIY project or working with professionals, understanding the exact steps ensures your roof gets the protection it deserves.
How to Apply a Crack-Repair Compound
The success of your repair starts with proper preparation. Thoroughly clean the crack of any dust, debris, or loose material. We recommend using a stiff wire brush to dislodge any loose concrete, followed by compressed air or a shop vacuum to remove all fine particles. Think of it like preparing a wound before applying a bandage—the cleaner the surface, the better the bond.
Next, mix the hydraulic cement compound according to the manufacturer’s instructions to a putty-like consistency. This part is crucial. Too wet, and the compound won’t have the strength you need. Too dry, and it won’t properly fill the crack. Follow those instructions precisely, as incorrect mixing can compromise the compound’s strength and expansion properties.
Now comes the hands-on part. Firmly press the compound into the crack using a trowel or putty knife, ensuring it completely fills the void. Work the material deep into the crack, eliminating any air pockets that could become future leak points. Smooth the surface flush with the surrounding concrete, and then exercise patience. The compound needs to cure fully, which can take 24 hours or more depending on the specific product, ambient temperature, and humidity levels. Always consult the product’s technical data sheet (TDS) for exact curing times—rushing this step undermines everything you’ve done so far.
How to Apply an Impregnating Sealer for Complete Protection
Once your repairs have cured completely, it’s time to protect the entire roof surface. This is where the magic of modern sealing technology really shines. Ensure the roof is completely clean, dry, and that all repairs are fully cured before you begin. Any residual moisture or debris will act as a barrier, preventing the sealer from penetrating properly.
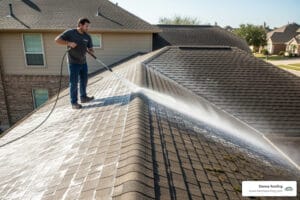
Apply the first coat of impregnating sealer evenly across the entire surface. For large flat roofs, a pump-up garden sprayer is often the most efficient method, giving you consistent coverage without the arm fatigue of rolling. For smaller sections or edges, a long-handled roller or brush works beautifully. The goal is even coverage without puddling—you want the sealer to soak in, not sit on top.
Here’s where timing becomes critical. Within 2 to 4 hours, while the first coat is still damp but has soaked in, apply a second coat. This “wet-on-wet” application technique is what separates a good job from a great one. It allows the second coat to be absorbed more readily, pushing those active ingredients deeper into the concrete’s capillaries. The first coat essentially opens the door, and the second coat walks right through, creating a robust, deep-seated hydrophobic barrier within the concrete itself.
The sealer will typically become rain-resistant within a few hours, meaning a light shower won’t wash away your hard work. However, full curing may take several days, during which time you should avoid heavy foot traffic. This patience pays off with water repellency that lasts for years.
How to Verify a Quality Waterproofing Job
How do you know if you’ve done it right? Start by referring to the manufacturer’s technical data sheets (TDS) for specific instructions and performance metrics. These documents aren’t just legal disclaimers—they provide crucial information on application rates, curing times, and expected performance that can make or break your project.
After the sealer has fully cured, perform a simple but telling water bead test. Sprinkle water on the surface and watch what happens. If the water forms tight, round droplets that dance across the surface, congratulations—your sealer is working effectively. If it soaks in or spreads out into a puddle, you may need another coat, or the initial application was insufficient.
For ultimate peace of mind, nothing beats professional verification. A professional residential flat-roof inspection can verify the integrity of the work and identify any potential issues before they become costly problems. Our team at Sienna Roofing has seen it all, and we’re always ready to provide expert assessments. Sometimes that second set of experienced eyes catches what you might have missed, saving you from future headaches. Give us a call at (832) 792-9338 if you’d like that extra layer of assurance.
Liquid-Applied Membranes: A High-Performance Alternative
Sometimes, a simple sealer just isn’t enough. For roofs that are a bit older, have seen more wear and tear, or even for commercial properties, we often recommend a different kind of superhero: the liquid-applied membrane. Think of these as a super-tough, seamless coating that forms a protective blanket over your entire roof. They’re typically made from advanced materials like silicone or polyurethane, creating a durable, flexible, and almost rubber-like waterproof layer.
The real magic here is their exceptional crack-bridging ability. While an impregnating sealer dives into the concrete’s pores, a liquid membrane forms a continuous layer right on the surface. This means it can stretch and move with your building, easily covering existing cracks and preventing new ones from forming. It’s like giving your roof a brand-new, flexible skin!
These membranes aren’t just about keeping water out, though; they’re also fantastic for saving you money on energy bills. Many liquid-applied systems are highly reflective, creating what we call a “cool roof.” This means they bounce sunlight away, significantly lowering your roof’s surface temperature. According to the Cool Roof Rating Council (CRRC), a cool roof can lower surface temperatures by up to 50°F, which for homeowners in our hot Texas climate – like those in Sugar Land, Missouri City, and Richmond, TX – can translate to a 15-35% reduction in cooling costs! It’s a smart way to beat the heat and help your AC take a break.
Choosing the Right Liquid-Applied Membrane: Silicone vs. Polyurethane vs. Acrylic
While “liquid-applied membrane” is a general category, the specific chemistry matters greatly. The three most common types for concrete roofs are silicone, polyurethane, and acrylic:
-
Silicone Roof Coatings: These are champions of UV stability and water resistance. Silicone is moisture-cured, so it performs exceptionally well in humid environments and can withstand ponding water better than other coatings. Its high reflectivity makes it an excellent cool roof material. The main drawbacks are that it attracts dirt and can be very slippery when wet. Adhesion is also a challenge, as nothing sticks to silicone—not even more silicone—so recoating requires a special primer.
-
Polyurethane Roof Coatings: Polyurethanes are known for exceptional durability and abrasion resistance, making them a fantastic choice for roofs with foot traffic, like a rooftop patio. They are typically applied in two parts: an aromatic base coat and a UV-stable aliphatic top coat. This process is more complex but results in a highly resilient finish.
-
Acrylic Roof Coatings: These water-based coatings are a cost-effective choice for roofs with good drainage. They offer good reflectivity and are easy to install. However, their biggest weakness is performance in ponding water. If water sits on an acrylic coating, it can soften and re-emulsify, leading to failure. For this reason, we typically only recommend acrylics for roofs with impeccable drainage, which can be a challenge in the Houston area.
The effectiveness of these solutions is truly global and long-standing. For example, in 2020 alone, over 100 million square meters of Sika roofing membranes were installed worldwide. This shows how proven and reliable these systems are. Developed over 50 years, and backed by experts in over 85 countries, these membranes are built to stand strong against wind, rain, snow, and even hail. They offer a robust and long-lasting cement flat roof solution in 2020 that continues to perform today.
One of the best parts is their versatility. Liquid-applied systems can be installed right over many existing roof types, including concrete. They conform perfectly to your roof’s unique shape and can even penetrate those tiny pores and fill voids, ensuring a complete seal. Often, these high-performance membranes are a much more cost-effective choice than a full roof replacement. To learn more about how these advanced coatings can benefit your home, explore our comprehensive flat roof systems, which can extend your roof’s lifespan by a fantastic 10 to 20 years.
Here’s a quick look at how impregnating sealers stack up against these powerful liquid-applied membranes:
| Feature | Impregnating Sealers | Liquid-Applied Membranes |
|---|---|---|
| DIY-Friendliness | High (for basic application) | Low (professional installation recommended) |
| Durability | Moderate (5-10 years) | High (10-20+ years, often warrantied) |
| Crack-Bridging | Very Low (cannot bridge visible cracks) | High (flexible, can bridge existing and new cracks) |
| Cost | Lower initial cost | Higher initial cost (but longer lifespan) |
| Appearance | No change to surface appearance | Forms a new visible layer, often colored |
| Slipperiness | No change | Can be made anti-slip with additives |
| Energy Savings | Minimal (unless combined with reflective paint) | High (cool roof properties) |
| Application | Penetrates pores, invisible barrier | Forms a seamless, rubber-like top layer |
Frequently Asked Questions about Concrete Roof Protection
How long does a concrete roof sealer last?
The lifespan of a concrete roof sealer depends significantly on the product quality, climate, and UV exposure. Here in Texas, where intense sun and heat can accelerate material breakdown, choosing the right product is crucial.
A high-quality impregnating silicone polymer sealer can typically last between 5-10 years before reapplication is needed. These penetrating sealers work by chemically bonding within the concrete, but over time, UV exposure and weathering gradually break down this protection. You’ll know it’s time for reapplication when water stops beading up on the surface and begins to soak in again.
Professional-grade liquid-applied membrane systems, such as those made from silicone or polyurethane, often come with warranties of 10 to 20 years, sometimes even more. These systems last longer because they form a thick, rubber-like protective layer that can flex and move with your building. Their superior durability comes from their robust composition and the fact that they’re applied much thicker than penetrating sealers.
Regular maintenance and proper initial application also play a crucial role in maximizing their longevity. Even the best cement flat roof solution in 2020—or today—will underperform if it’s applied incorrectly or over a poorly prepared surface.
Can I paint over a sealed concrete roof?
Generally, no, you cannot effectively paint over a surface treated with an impregnating sealer. The primary function of an impregnating sealer is to make the concrete highly hydrophobic, meaning it repels water. This same property that repels water will also prevent most paints from adhering properly, leading to peeling, flaking, and a short-lived finish.
Think of it this way: if water can’t stick to the surface, paint won’t either. The sealer is doing exactly what it’s supposed to do—keeping moisture out—but that makes it nearly impossible for paint to form a proper bond.
If you desire a specific color or a more robust surface, a liquid-applied membrane system is the better choice. These membranes are typically available in various colors—white, tan, gray, and more—and serve as the final colored finish. They don’t require painting because they are the finish layer. Plus, many come in highly reflective colors that create a cool roof, reducing your energy costs while providing superior waterproofing.
Is sealing a concrete roof a DIY project?
Applying a simple impregnating sealer can indeed be a DIY project for a homeowner with the right tools and a keen attention to detail. The process often involves cleaning the surface thoroughly, applying two coats with a pump sprayer or roller, and allowing it to cure. If you’re comfortable with basic home maintenance and can follow manufacturer instructions carefully, this is within reach for most homeowners.
However, for extensive crack repairs, dealing with existing severe leaks, ensuring proper surface preparation for optimal adhesion, or the application of advanced liquid membrane systems, professional installation is highly recommended. These complex jobs require specialized equipment, expertise, and precision to ensure a warrantied, leak-proof, and long-lasting result.
Here’s the reality: improper surface prep is the number one reason waterproofing fails. If the concrete isn’t completely clean and dry, or if repairs aren’t fully cured, even the best products won’t perform as intended. Professional installers know how to identify hidden issues, properly prepare surfaces, and apply products at the right thickness and coverage rates.
For homeowners in Sugar Land, Missouri City, and Richmond, TX, where our intense heat and sudden storms put extra stress on flat roofs, having that professional expertise can mean the difference between a roof that lasts 10+ years and one that starts failing within a year. At Sienna Roofing, we’ve seen countless DIY attempts that seemed fine initially but developed problems down the road. That’s why we offer comprehensive inspections and professional installation backed by our 100% satisfaction guarantee.
If you’re unsure whether your project is DIY-appropriate, give us a call at (832) 792-9338. We’re happy to provide honest advice—even if that advice is that you can handle it yourself. Our goal is to help you make the right decision for your home and budget.
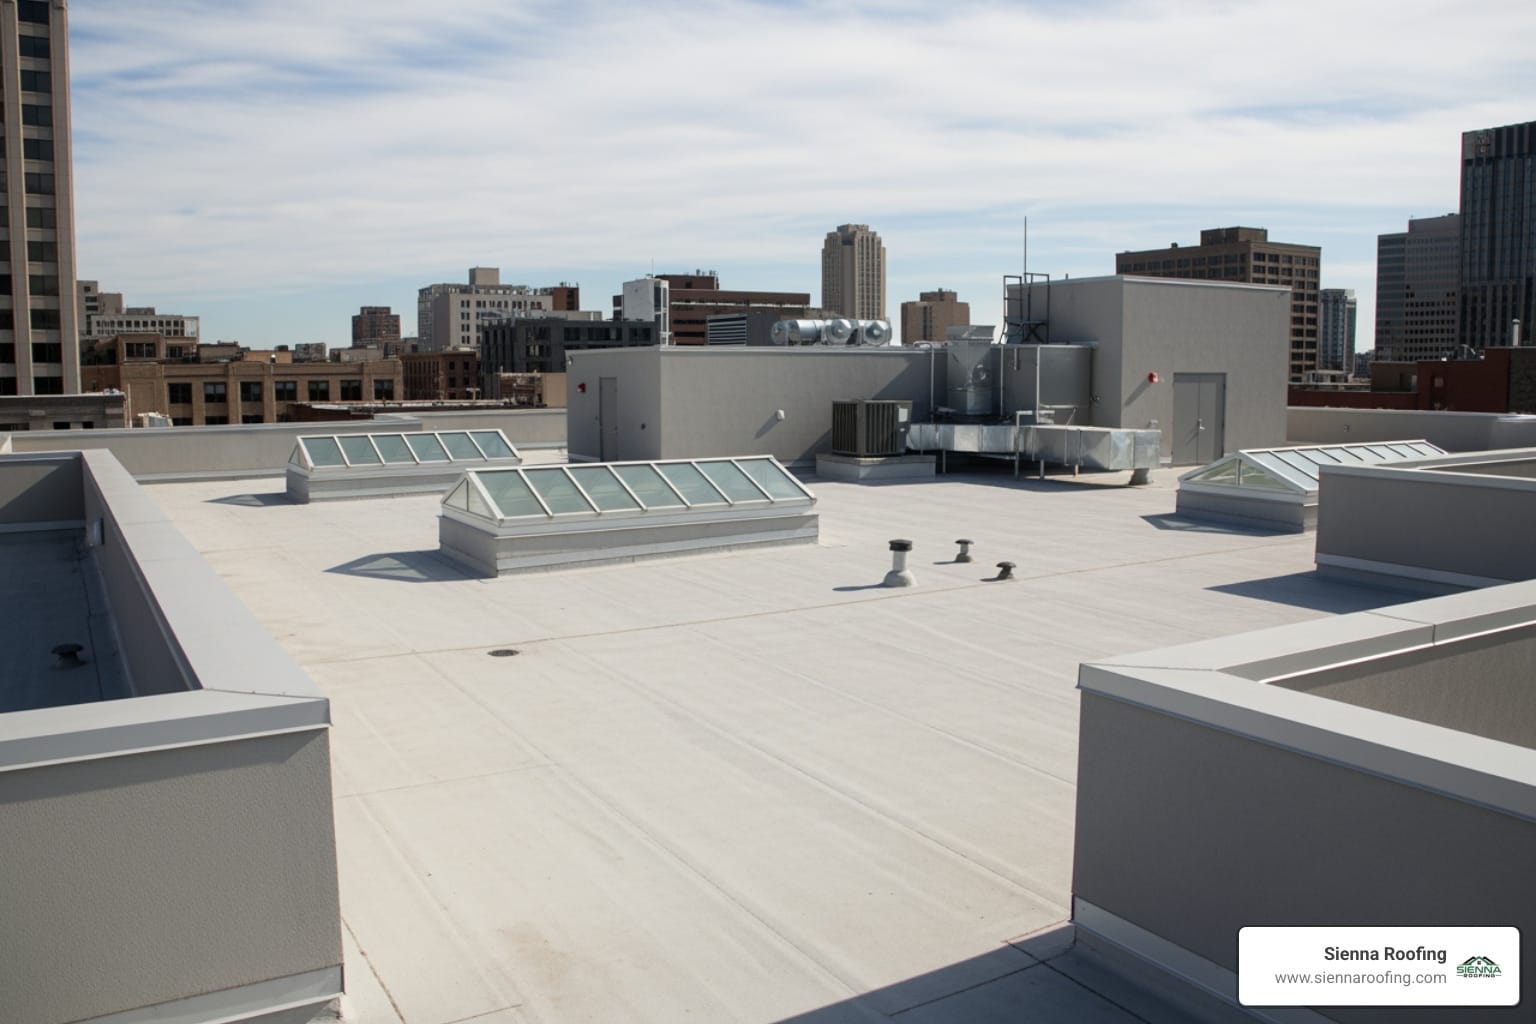
What is “ponding water” and why is it so dangerous for a flat roof?
Ponding water is any water that remains on a roof surface for more than 48 hours after rainfall. While small puddles might seem harmless, they are a flat roof’s worst enemy. The problem is twofold: weight and infiltration.
First, water is heavy—about 5.2 pounds per square foot per inch of depth. A large area of ponding water can add thousands of pounds of unexpected load to your roof structure, potentially leading to sagging and stress.
Second, that standing water is constantly working to penetrate your roof. It accelerates the breakdown of sealers and membranes, finds its way into the tiniest pinholes, and dramatically increases the risk of a major leak. In fact, most roofing material warranties are explicitly voided by the presence of ponding water. It’s a clear sign that your roof lacks adequate drainage, which could be due to a poor initial design, sagging, or clogged drains. If you see ponding water on your roof 48 hours after a storm, it’s a critical issue that needs to be addressed by a professional to prevent long-term damage.
Protect Your Investment with Professional Flat Roof Services
Your concrete flat roof represents a significant investment in your home, and protecting it properly is essential to avoid costly repairs down the road. The good news is that you now understand exactly what it takes: a methodical two-step process of repairing visible cracks first, then sealing the entire surface against moisture intrusion through microscopic pores. This comprehensive approach addresses both failure modes that threaten flat concrete roofs, giving you the best chance at long-term, leak-free performance.
For simple maintenance and basic sealing projects, the DIY route can work well if you’re comfortable working at heights and following manufacturer instructions precisely. However, when it comes to extensive crack repairs, dealing with persistent leaks, or installing advanced technologies like the liquid-applied membrane systems that defined the optimal cement flat roof solution in 2020, professional expertise makes all the difference. These high-performance solutions require specialized equipment, precise application techniques, and an understanding of how different products interact with Texas’s unique climate challenges—from our intense UV exposure to our sudden, heavy downpours.
At Sienna Roofing, we’ve spent years perfecting the art and science of flat roof systems that stand up to everything our region throws at them. Our team knows exactly which products perform best in the Sugar Land, Missouri City, and Richmond areas, and we back every installation with our 100% satisfaction guarantee. We’re not just contractors—we’re your neighbors, and we’re personally invested in keeping your home dry and protected.
The difference between a roof that lasts five years and one that lasts twenty often comes down to proper installation and quality materials. When you work with professionals, you’re getting more than just labor—you’re getting warranties, expertise in surface preparation, and the peace of mind that comes from knowing the job was done right the first time. Our personalized, community-driven approach means we treat your home with the same care we’d give our own.
Don’t wait until a small leak becomes a major disaster. Whether you need a simple inspection to assess your roof’s current condition or a complete waterproofing overhaul, we’re here to help. Contact our team today at (832) 792-9338 for a free, no-obligation consultation. Let’s work together to keep your concrete flat roof—and everything under it—dry, durable, and protected for decades to come.