Chimney Flashing Repair 2024: Expert Guide
Why Chimney Flashing Repair Matters for Your Home
Chimney flashing repair is one of the most critical maintenance tasks for protecting your home from water damage. The flashing, a system of metal sheets where your chimney meets the roof, is a primary defense against leaks. When it fails, water can seep into your home’s structure, leading to costly issues like wood rot and mold.
Quick Answer: Common Signs You Need Repair
- Water stains on ceilings or walls near the chimney
- Dripping sounds or visible water in the firebox
- Rust stains on the chimney or flashing
- Gaps between the chimney and roof
- Musty odors in the attic
Average Repair Costs
- Professional repair: $400 – $1,600
- DIY materials: $20 – $200
- Labor rate: ~$75 per hour
I’m Andre Castro, founder of Sienna Roofing & Solar. With a Construction Management degree from Texas A&M and years of hands-on experience in the Houston Metro area, I’ve seen how a small flashing issue can become a major problem. This guide will walk you through what you need to know to get a fair estimate and a lasting repair, ensuring your home stays safe and dry.
What is Chimney Flashing?
A leaky chimney is a common source of roof leaks, and the culprit is almost always failed flashing. Chimney flashing is a system of sheet metal installed where your chimney and roof intersect. Its sole purpose is to create a waterproof seal that diverts water away from this vulnerable joint and toward your gutters.
Neglecting chimney flashing repair can lead to significant structural issues, including rotted wood framing, damaged ceilings, and dangerous mold growth. The flashing system is integrated with both your roofing materials and chimney structure, redirecting water away from one of the most challenging spots on a roof to keep watertight. When properly installed, it should keep your home dry for decades.

The diagram above shows the key parts of a chimney flashing system. It includes step flashing woven with shingles, counter flashing embedded in the chimney’s mortar, base flashing at the bottom, and a chimney saddle to divert water on wider chimneys. Each component is essential for keeping water out.
7 Signs Your Chimney Flashing Needs Repair
Catching flashing problems early can mean the difference between a simple roof leak repair and extensive structural damage. Here are seven key warning signs that your chimney flashing needs attention:
- Water Stains: Brownish or yellow stains on ceilings or walls near the chimney are the most common sign of a leak.
- Dripping or Puddles: Hearing dripping sounds from the chimney or seeing water in the firebox during rain is a clear red flag.
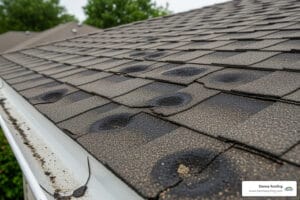
- Rust Stains: Orange-brown streaks on your chimney exterior indicate the metal flashing is corroding and failing.

- Visible Gaps or Cracks: Any separation between the flashing and the chimney or roof is a direct entry point for water.
- Deteriorated Sealant: Peeling, cracking, or missing caulk around the flashing compromises the waterproof seal.
- Damaged Masonry: Discolored bricks, damp mortar, or white chalky deposits (efflorescence) on the chimney suggest prolonged water exposure, often from failed flashing.
- Musty Odors: A damp, musty smell in your attic, especially after rain, points to a persistent leak.
Ignoring these signs allows water to cause wood rot, mold growth, and other costly damage. A $500 repair today can prevent thousands of dollars in damage later.
When to Repair vs. When to Replace
Understanding whether you need a repair or a full replacement is key to a cost-effective solution.
A repair is often sufficient for minor damage. If the metal flashing is structurally sound but has failing sealant or a few small gaps, resealing can solve the problem affordably. This is a common fix for isolated issues on otherwise healthy flashing.
A full replacement is necessary for extensive damage. Widespread corrosion, large holes, or flashing that has pulled away from the chimney or roof requires a complete replacement. If the flashing was installed incorrectly or is nearing the end of its material lifespan (15-20 years for galvanized steel), replacement is the only way to guarantee a long-term, leak-free solution.
Chimney Flashing Explained: Materials, Types, and Integration
Proper chimney flashing is an engineered, multi-layered system, not just a single piece of metal. Understanding its components helps you make informed decisions about your chimney flashing repair.
Common Flashing Materials and Their Lifespan
The material used for flashing directly impacts its cost and longevity. Here are the three most common options:
- Galvanized Steel: The most budget-friendly choice (~$0.50/linear foot), lasting 15-20 years. It requires periodic painting to prevent rust once its protective zinc coating wears down.
- Aluminum: A mid-range option (~$0.75/linear foot) with a 20-25 year lifespan. It’s flexible and corrosion-resistant but softer than steel and requires painting to prevent oxidation.
- Copper: The premium material ($2-$3/linear foot) with a lifespan of 50+ years, often outliving the roof itself. It’s extremely corrosion-resistant and requires minimal maintenance, making it a cost-effective long-term investment.
Step Flashing vs. Counter Flashing
Industry-standard flashing uses a two-part system for a durable, watertight seal:
- Step Flashing: These are L-shaped metal pieces woven into the shingle courses along the sides of the chimney. Each piece overlaps the shingle below it, creating a layered path for water to flow down the roof.
- Counter Flashing: This is the second layer, which is embedded into the chimney’s mortar joints. It overlaps the top edge of the step flashing, acting as an apron to prevent water from getting behind it.

This interlocking system ensures water is always directed down and away from the chimney-roof intersection.
How Flashing Integrates with Your Roof
Proper flashing installation is a comprehensive process. It begins with a self-adhering waterproof membrane (like an Ice & Water Shield) applied to the roof deck around the chimney as a secondary barrier. The step flashing is then integrated with the shingles, and the counter flashing is secured to the masonry. For chimneys wider than 30 inches, a chimney cricket) is built on the high side to divert water and prevent pooling, a common source of leaks. This integrated approach is critical for long-term protection.
The Cost of Chimney Flashing Repair: A 2024 Breakdown
In the Sugar Land area, a professional chimney flashing repair typically costs between $400 and $1,600. Understanding the factors that influence this price helps you evaluate estimates and avoid surprises.
Key Cost Factors
- Labor: Professional labor rates in our area average around $75 per hour. A simple resealing may take a few hours, while a full replacement can take a day or more.
- Extent of Damage: A minor repair like sealing a gap might cost $200-$300. A complete replacement of all flashing components will be on the higher end of the price range.
- Material Choice: Costs vary from budget-friendly galvanized steel ($0.50/linear foot) to premium, long-lasting copper ($2-$3/linear foot).
- Roof Accessibility & Chimney Size: Steep roofs, multi-story homes, and large chimneys increase labor time and material needs, raising the overall cost. A difficult-to-access chimney can increase the price by 20-40%.
Potential Additional Costs
Flashing leaks often cause collateral damage. Be prepared for potential additional costs identified during an inspection:
- Masonry Repair: Water can damage mortar and bricks, with repairs ranging from $300 for minor cracks to over $3,000 for significant deterioration.
- Wood Rot Repair: This is where costs can escalate. Repairing water-damaged roof decking or rafters can range from $100 for small patches to $4,000+ for structural work.
- Chimney Crown Repair: Sealing or rebuilding the concrete cap on top of the chimney can cost between $150 and $2,000.
DIY vs. Professional Repair Costs
While a DIY repair might only cost $20 to $200 in materials, it comes with significant risks. Professional services range from $400 to $1,600 but provide crucial value.
Improper DIY installation is a common and costly mistake. Chimney flashing is a complex system; a failed repair can lead to continued water intrusion, causing thousands in wood rot and mold damage while you believe the problem is fixed. Furthermore, working on a roof is dangerous. The National Roofing Contractors Association (NRCA) highlights the serious risks of falls. For anything beyond minor re-caulking, hiring a professional with the right tools, safety equipment, and warranty is the most cost-effective and safest choice.
The Professional Chimney Flashing Repair Process
Understanding the correct procedure for a chimney flashing repair is key, whether for a minor fix or a full replacement. Professional roofers follow strict standards, like those from the National Roofing Contractors Association (NRCA), to ensure a lasting, watertight seal.
Essential Safety Precautions
Working on a roof is dangerous. Professionals use critical safety equipment, and any DIY attempt should as well. This includes a personal fall arrest system (harness and rope), a properly secured ladder, slip-resistant footwear, and eye protection. Always work in dry, calm weather. If you are not experienced and equipped for working at heights, it is always safest to hire a professional.
A Step-by-Step Guide to a Lasting Repair
A professional replacement follows a precise sequence to guarantee performance:
- Inspection and Removal: The old flashing, sealant, and surrounding shingles are removed to expose the roof deck.
- Deck Repair: The wood decking is inspected for rot and repaired or replaced as needed to create a solid base.
- Ice & Water Shield: A self-adhering waterproof membrane is installed on the deck and up the sides of the chimney as a secondary leak barrier.
- Base and Step Flashing: A new metal base flashing is installed, followed by L-shaped step flashing pieces woven in with each new shingle course.
- Cricket Installation (if needed): On chimneys wider than 30 inches, a cricket is installed on the high side to divert water.
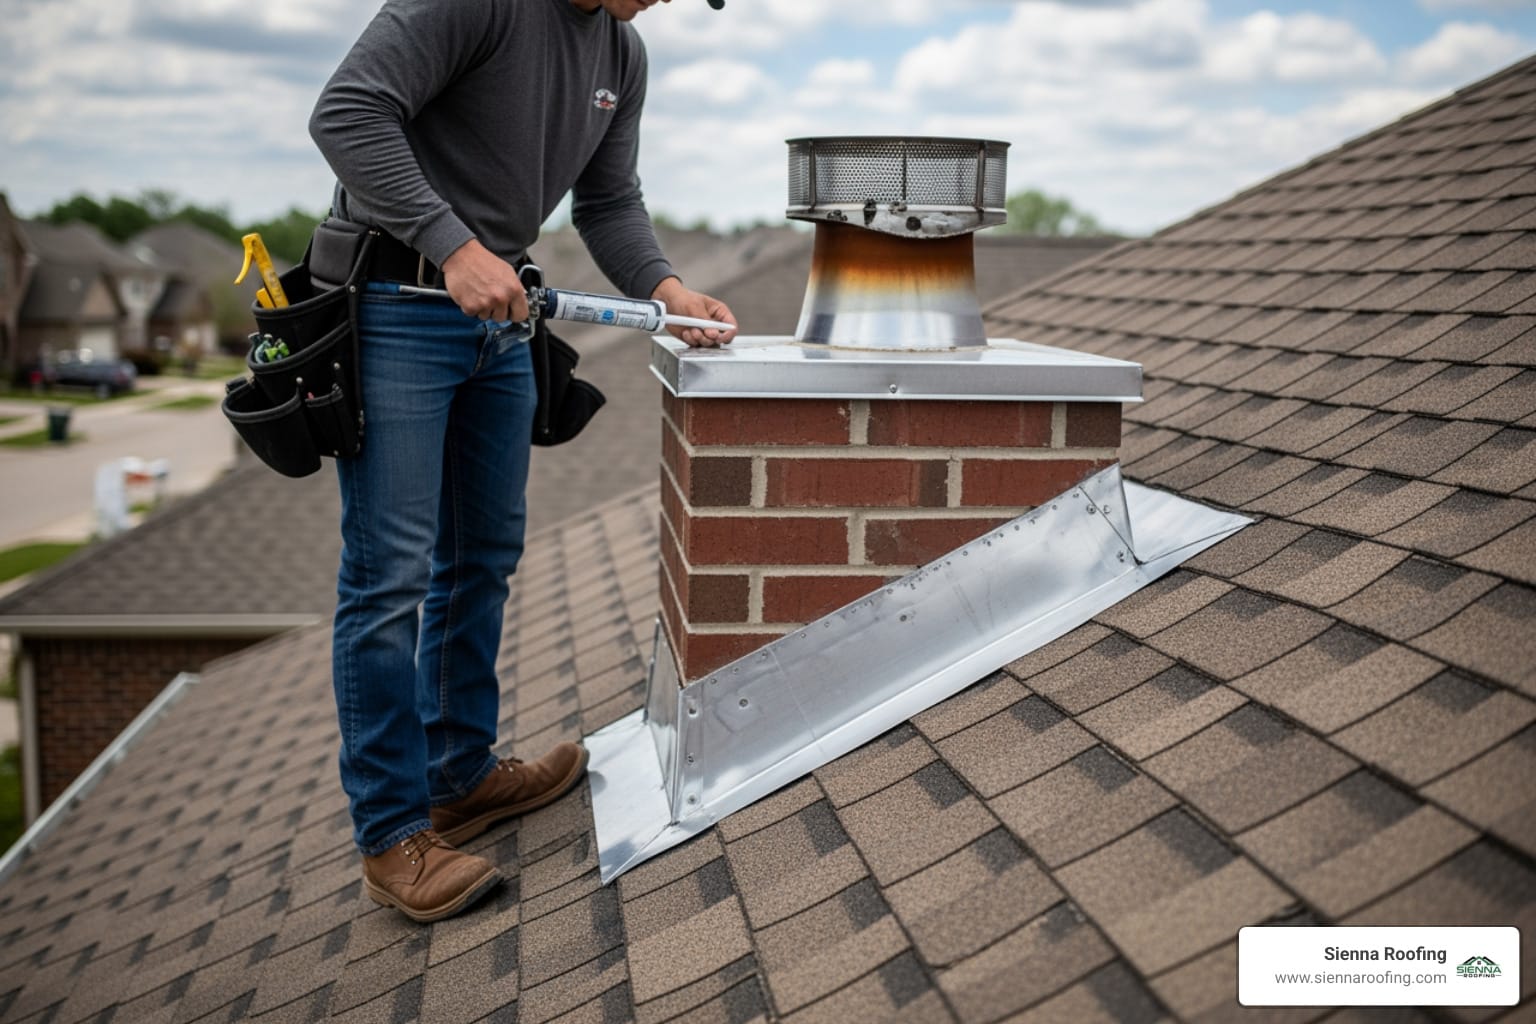
- Counter Flashing: The final metal layer is cut into the chimney’s mortar joints and folded down over the step flashing to create a protective seal.
- Sealing: All joints and edges are sealed with high-grade polyurethane caulk.

When to Call a Professional
While re-caulking a small gap might seem like a simple DIY, most chimney flashing repair jobs are best left to professionals. Call an expert if you see signs of wood rot or masonry damage, are uncomfortable with heights, have a steep or complex roof, or simply want the peace of mind that comes with a warranty-backed, professional installation.
Frequently Asked Questions about Chimney Flashing
Here are answers to the most common questions we hear from homeowners in Sugar Land, Missouri City, and Richmond about their chimney flashing.
What are the consequences of ignoring a leaky chimney?
Ignoring a leaky chimney is one of the most costly mistakes a homeowner can make. The consequences are severe and compounding:
- Structural Wood Rot: Water destroys roof decking and framing, compromising your roof’s integrity.
- Interior Damage: Leaks lead to stained and sagging ceilings, peeling paint, and warped drywall.
- Hazardous Mold Growth: Persistent moisture creates a breeding ground for toxic mold in attics and walls, posing health risks.
- Chimney Deterioration: Water damages bricks and mortar, which can lead to chimney instability and potential collapse.
An $800 flashing repair today can prevent a $15,000 structural and mold remediation nightmare tomorrow.
How can I prevent chimney flashing problems?
Preventative maintenance is the most effective way to avoid costly flashing failures. Key actions include:
- Annual Roof Inspections: Have a professional inspect your roof and flashing annually to catch minor issues before they escalate.
- Clean Gutters: Ensure water flows freely away from your chimney base by cleaning gutters at least twice a year.
- Trim Trees: Keep tree branches at least six feet away from your chimney to prevent them from scraping or damaging the flashing.
- Seal Minor Gaps: Address peeling caulk or small gaps immediately with a quality polyurethane sealant to maintain the waterproof barrier.
How long should properly installed chimney flashing last?
The lifespan of chimney flashing is directly related to the material used and the quality of the installation.
- Copper: 50+ years. The premium choice, it often outlasts the roof itself.
- Aluminum: 20-25 years. A good mid-range option that balances cost and longevity.
- Galvanized Steel: 15-20 years. The most common budget option, its lifespan depends on regular maintenance to prevent rust.
Ideally, flashing should last the lifetime of your roof shingles (20-30 years). However, improper installation or lack of maintenance can cause it to fail in as little as 8 years.
Secure Your Home with a Leak-Free Chimney
Your chimney flashing is a critical defense against water damage. Understanding the signs of failure, material options, and repair costs empowers you to protect your home’s value and structural integrity. While minor sealing can be a DIY task, a full chimney flashing repair or replacement is a complex job that demands professional expertise to ensure a lasting, watertight seal.
For homeowners in Sugar Land, Missouri City, and Richmond, investing in a professional repair is a smart financial decision. The cost is minimal compared to the thousands you could spend on water damage, mold remediation, and structural repairs from a neglected leak.
Don’t wait for a small leak to become a major disaster. If you’ve noticed water stains, rust, or gaps around your chimney, it’s time to take action. At Sienna Roofing, we provide expert chimney flashing repairs with a 100% satisfaction guarantee.
Ready to secure your home? Schedule your inspection online with a trusted roofer in Rosenberg, TX. We’ll provide a fair, detailed estimate so you can move forward with confidence.