Corrugated metal roof installation: Flawless 70-Year
Your Essential Guide to Corrugated Metal Roof Installation
Installing a corrugated metal roof is an excellent investment, offering a blend of durability, cost-effectiveness, and modern appeal. Homeowners looking for a long-term solution will find that a corrugated metal roof installation provides superior protection and value. Metal roofs have an impressive lifespan of 40 to 70 years, far outlasting asphalt shingles, and their energy-efficient properties can significantly lower cooling costs. While many DIY enthusiasts can tackle this project on smaller structures, this guide from Sienna Roofing provides a clear blueprint for achieving professional results on any project.
As Andre Castro, CEO of Sienna Roofing, my goal is to share my hands-on experience to equip you with the precise steps and best practices for a secure and lasting roof.

Why Choose Corrugated Metal? The 70-Year Roofing Solution
Corrugated metal roofing is a smart, long-term investment for any property. These roofs are engineered to last, boasting an incredible lifespan of 40 to 70 years, compared to the 15-20 year lifespan of traditional asphalt shingles. This longevity saves significant time, money, and hassle on future replacements.
Beyond durability, corrugated metal roofs are champions of energy efficiency. They reflect solar heat, which can reduce cooling costs by up to 25%, according to the U.S. Department of Energy. In the warm climates of Sugar Land, Missouri City, and Richmond, TX, this thermal resistance helps maintain a cooler indoor environment and lowers utility bills.
Additionally, these roofs require minimal maintenance and can boost a home’s resale value. They provide a sturdy, sustainable solution that stands up to even the harshest weather, protecting your property for decades.
Corrugated Metal vs. Other Roofing Materials
While the initial cost of corrugated metal may be higher than materials like asphalt shingles, the long-term savings and superior performance make it a clear winner. Here’s a direct comparison:
| Feature | Corrugated Metal Roofing | Asphalt Shingles |
|---|---|---|
| Cost | Moderate to High (Higher upfront, lower long-term) | Low to Moderate (Lower upfront, higher long-term) |
| Durability | Excellent (Resistant to fire, rot, pests, high winds) | Good (Susceptible to wind, hail, UV degradation) |
| Installation Complexity | Moderate (DIY possible for small projects, pros for large) | Moderate (Common DIY, but often professional) |
| Lifespan | 40-70 years | 15-20 years |
| Weather Resistance | Excellent (Withstands heavy rain, hail, high winds) | Fair to Good (Can crack, lift, or shed granules) |
| Maintenance Requirements | Low (Annual inspection, cleaning) | Moderate (Regular inspections, granule loss, repairs) |
Note: This comparison focuses on metal options and excludes non-metal alternatives to align with Sienna Roofing’s core offerings.
While proper insulation techniques are required for larger homes, corrugated metal roof installation is an ideal and cost-effective solution for sheds, workshops, and patios, often manageable as a DIY project.
Gearing Up: Essential Tools and Materials for a Flawless Installation
Proper preparation is key to a safe and efficient installation. Before you begin, gather all necessary tools and materials. Safety is paramount—always use Personal Protective Equipment (PPE), never work in bad weather, and be aware of your surroundings, including power lines. A successful corrugated metal roof installation begins with a commitment to safety.

Must-Have Tools and Safety Gear
Having the right tools makes the project manageable. Your essential toolkit should include:
- Measurement & Marking: Tape measure, chalk line
- Fastening: Electric drill with a 3/16″ bit, screw gun
- Cutting: Metal shears, nibbler, or an angle grinder
- Sealing: Caulking gun for sealants
- Safety & Access: Sturdy ladder, safety harness, work gloves, safety glasses, and rubber-soled shoes
Selecting the Right Corrugated Metal Material
The material you choose impacts longevity, appearance, and cost. Here are the most common options:
- Galvanized Steel: The industry standard, offering excellent durability and strength at a cost-effective price point.
- Aluminum: Lightweight and highly corrosion-resistant, making it ideal for coastal areas. It will not rust but can be more prone to denting.
- Copper: A premium material known for its exceptional durability and the beautiful green patina it develops over time.
- Zinc: Offers outstanding longevity and self-healing properties that repair minor scratches. It is also an eco-friendly choice.
Also, consider the panel’s gauge (thickness) and finish. A lower gauge number indicates a thicker, stronger panel (e.g., 22-gauge is thicker than 26-gauge). Finishes range from bare galvanized to pre-painted options that improve weather resistance and curb appeal.
For a detailed breakdown of costs, see our Metal Roof Cost Guide 2025.
Step-by-Step: How to Install a Corrugated Metal Roof Like a Pro
Breaking down the installation into manageable steps makes the process achievable. Always prioritize safety and follow the manufacturer’s instructions for your specific materials.

Step 1: Roof Preparation and Accurate Measurement
A solid foundation is critical. First, remove all old roofing materials and inspect the roof deck for damage, replacing any rotten or soft sections. Ensure the surface is smooth and free of protruding fasteners. Next, verify the roof is square using the “3-4-5 triangle method”: measure 3 feet along one edge and 4 feet along the perpendicular edge; the diagonal between these points must be exactly 5 feet. Finally, measure your roof’s total area and order 10-15% extra material to account for waste and overlaps. Always check local building codes in Sugar Land, Missouri City, or Richmond before starting.
Step 2: Installing Underlayment and Drip Edge
This layer provides critical moisture protection. Install a high-quality synthetic roofing underlayment, starting at the eaves and rolling it out horizontally. Overlap each strip by 1-2 inches. Next, install the eave trim (drip edge) over the underlayment along the low sides of the roof to divert water. Fasten it every 12-16 inches. Finally, apply sealant tape and lay foam closure strips along the flashing to prevent water, debris, and pests from getting under the panels.
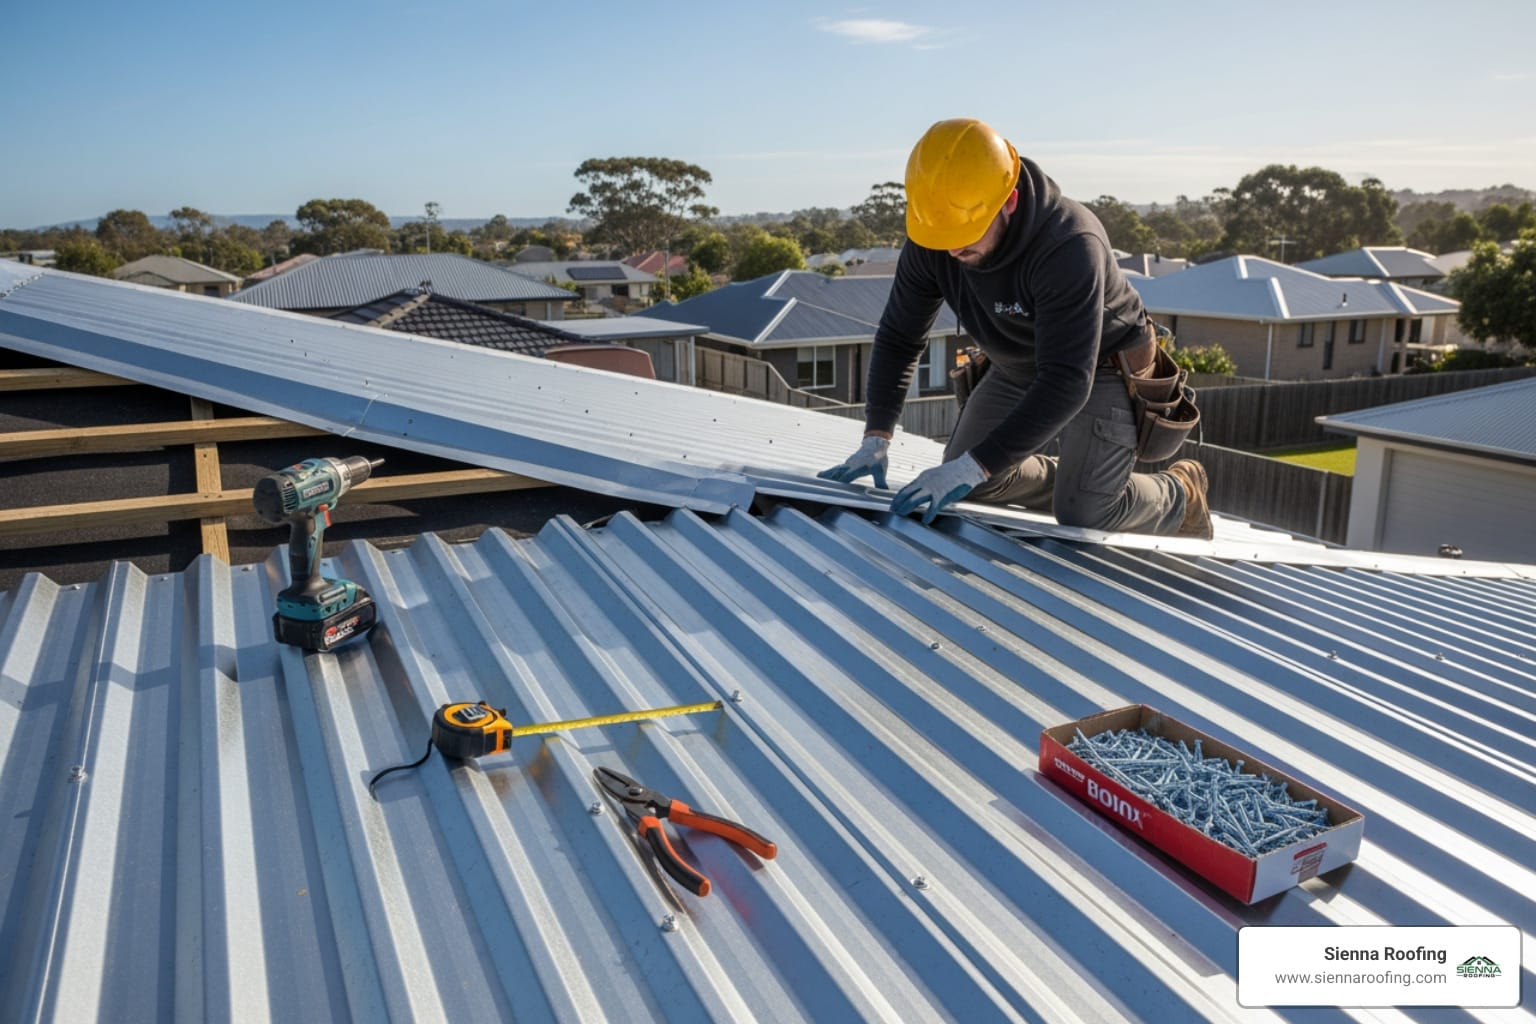
Step 3: Panel Placement and Fastening
Precision is key to a leak-free roof. Start at one corner, placing the first panel onto the closure strips with a 4-inch overhang at the eave to direct water into gutters. Overlap subsequent panels by one full corrugation (3-4 inches). For low-slope roofs, use butyl sealant at the side laps. The most critical step is fastening: place screws in the flats of the panel where it meets the decking, not in the valleys where water flows. Pre-drill holes and drive 1.5-inch wood screws until the washer compresses slightly to create a seal, but do not over-tighten. Use butyl tape when splicing panels for extra waterproofing. Continuously check panel alignment against your chalk line.
Step 4: Cutting and Shaping Panels
You will likely need to cut panels to fit around obstacles or at the end of a run. Use an angle grinder, metal shears, or a nibbler for clean cuts. To prevent rust, cut panels from the backside so metal shavings (swarf) fall away from the finished surface. Immediately clean all shavings from the panel, as they can cause rust and void your warranty. For unpainted panels, prime the cut edges to prevent corrosion.
Finishing Touches: Flashing, Trim, and Complex Roof Details
Trim and flashing are the critical components that ensure a watertight, professional finish. These elements protect your roof’s most vulnerable points from water intrusion.
Installing Ridge Caps and Gable Trim
First, install gable (rake) trim on top of the panels along the high, sloped sides of the roof. Overlap sections by 3-4 inches and secure with screws. For extra protection, add a bead of butyl tape between overlaps.
The ridge cap is the final piece, covering the peak where two roof slopes meet. Before installation, place foam closure strips in the gap between the panels at the peak. In warm climates like Texas, a vented ridge cap is recommended to allow hot air to escape, reducing cooling costs. Overlap ridge cap sections by 3-4 inches, apply sealant where they meet, and secure with screws for a watertight seal.
Managing Valleys, Sidewalls, and Endwalls
Proper flashing is essential in complex areas where water can collect.
- Valleys: Where two roof slopes intersect, install open valley flashing before the panels to create a channel for water runoff. This is a high-risk area for leaks if not handled correctly. For a visual guide, see this video: How To Install Open Valley Trim For Metal Roofing.
- Sidewall Flashing: Use this L-shaped trim where a roof meets a vertical wall (e.g., a dormer) to direct water away from the joint. Install it before the final panel in the area.
- Endwall Flashing: This is used where panels run up into a vertical wall. It is installed after the panels, overlapping their top edge to shed water.
- Reglet Trim: For masonry walls like brick or chimneys, cut a joint (a reglet) into the wall and insert this specialized trim to create a highly effective, professional seal.
Corrugated Metal Roofing FAQs: Expert Answers to Common Questions
Here are concise answers to common questions about corrugated metal roof installation.
What are the most common mistakes to avoid during installation?
Most installation problems stem from a few preventable errors. Avoid these common mistakes:
- Incorrect Screw Placement: Never place screws in the valleys where water flows. Fasten them in the flats or on the ridges as specified by the manufacturer.
- Improper Fastener Tension: Over-tightening dents panels and damages washers, while under-tightening fails to create a seal.
- Inadequate Panel Overlap: Ensure a full corrugation overlap (3-4 inches) and use butyl tape at splices.
- Not Removing Metal Shavings (Swarf): These particles will rust and stain the roof finish. Clean them off immediately after cutting.
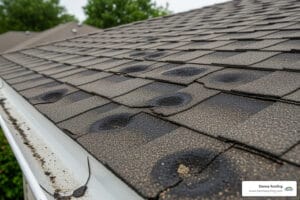
- Poor Flashing Installation: Missing or improperly installed flashing at eaves, ridges, valleys, and walls is a primary cause of leaks.
- Not Squaring the Roof: An unsquared foundation leads to crooked panels and gaps.
What are the maintenance requirements for a corrugated metal roof?
While low-maintenance, some care ensures a full 40-70 year lifespan:
- Annual Inspections: Check for loose fasteners, damaged panels, or compromised flashing.
- Gutter Cleaning: Prevent water backup by keeping gutters free of debris.
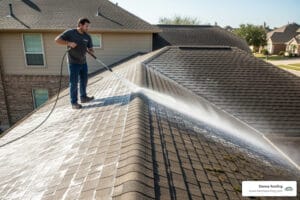
- Gentle Cleaning: Wash with plain water or a mild detergent and a soft-bristle brush. Avoid abrasive cleaners.
- Check Fasteners and Sealant: Periodically inspect and re-tighten or re-seal as needed.
- Debris Removal: Promptly remove branches or leaves that can trap moisture.
How does installing corrugated metal on a roof differ from a wall?
The primary differences are driven by the need for a roof to be completely watertight.
- Slope: Roofs require a minimum slope (typically 1:12 or 3:12) to shed water effectively. Walls are vertical and do not have this requirement.
- Underlayment: Roofs demand a robust, water-resistant underlayment as a secondary moisture barrier. Walls typically use a house wrap or vapor barrier.
- Fastening & Flashing: Roof installation involves specific fastening patterns to resist wind uplift and extensive flashing details at every transition to manage water flow. Wall installations have different requirements focused on weather resistance rather than complete watershedding.
Conclusion: Achieve DIY Success or Trust the Pros at Sienna Roofing
We hope this guide has given you the confidence to approach your corrugated metal roof installation. This roofing system is a fantastic choice for its durability, energy savings, and modern aesthetic, adding significant value to properties in Sugar Land, Missouri City, and Richmond, TX.
A DIY installation can be a rewarding project for simpler structures like sheds or patio covers. However, for larger homes, complex rooflines, or steep pitches, the project can become overwhelming and dangerous. Achieving a perfect, watertight seal on a complicated roof requires professional expertise.
For these projects, trusting a professional is the smartest move. At Sienna Roofing, our team has the experience and tools to ensure your new roof is installed flawlessly, providing decades of worry-free protection. We are proud to offer expert roof installation services across the Houston area.
Ready to discuss your roofing needs? Contact us today for a free estimate to speak with one of our roofing specialists.