Why Roof Leaks Repair Demands Immediate Action
When it comes to roof leaks repair, time is your enemy. Even a small leak can quickly escalate into thousands of dollars in damage, affecting your home’s structure, insulation, and interior spaces.
Quick roof leaks repair solutions include:
- Immediate fixes: Apply roofing cement and patch material for small holes
- Vent repairs: Replace cracked pipe boots with new rubber seals
- Shingle replacement: Remove damaged shingles and install new ones
- Flashing repair: Re-seal or replace damaged flashing around chimneys and vents
- Professional help: Call experts for leaks you can’t locate or widespread damage
A homeowner looking for reliable roof repair faces a critical decision point when water starts dripping through their ceiling. Research shows that most roof repairs cost between $150 to $1,500, but ignoring the problem can lead to mold growth, structural rot, and even roof collapse in extreme cases.
The stress of a roof leak isn’t just about the water itself – it’s about the potential damage that follows. As one industry expert notes, “Even the smallest of roof leaks can be stressful. But it’s not the actual roof leak that causes the worrying. It’s the damage that the water may cause if it doesn’t get attended to fast.”
I’m Andre Castro, CEO and founder of Sienna Roofing & Solar, with over five years of experience helping homeowners tackle roof leaks repair challenges throughout the Houston Metro area. My hands-on approach to roofing solutions has taught me that quick action and proper techniques are essential for preventing minor leaks from becoming major headaches.

First Steps: How to Find the Source of a Roof Leak

That telltale water stain on your ceiling might be your first clue, but here’s the tricky part – water rarely drips where it actually enters your roof. Like a sneaky house guest, it can travel several feet along rafters and joists before making its dramatic appearance on your ceiling. This makes roof leaks repair feel like detective work, and honestly, that’s exactly what it is.
When you’re dealing with a leak, your professional roofing team knows that the real investigation starts from the inside out. Water follows gravity and the path of least resistance, which means tracking it backward to find the source requires patience and a good flashlight.
Signs of a Leak Inside and in the Attic
Before you even think about climbing onto your roof, grab that flashlight and start gathering clues from inside your home. The attic is usually your best starting point because it’s where water damage shows up first, often long before you see anything on your living room ceiling.
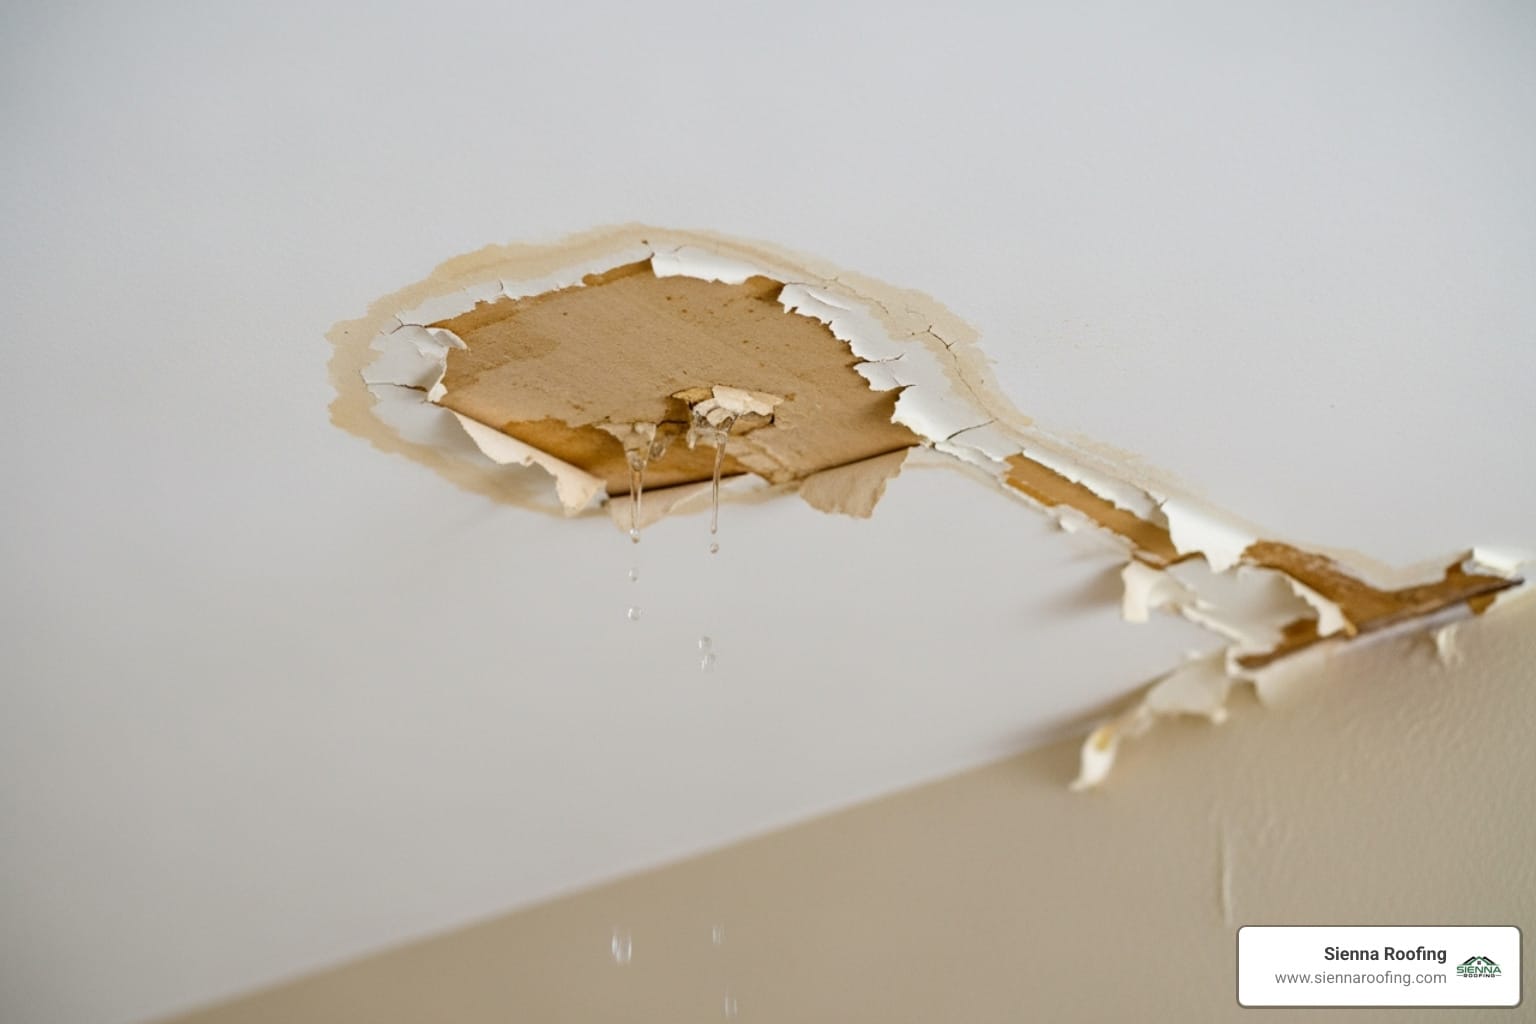
Water stains are the most obvious red flags – those yellow, brown, or greenish discolored spots on ceilings and walls that seem to appear overnight. But don’t stop there. Peeling paint that’s bubbling or blistering tells you moisture is lurking behind the surface, even when everything looks dry.
Your nose can be just as helpful as your eyes. Musty odors in the attic or upper floors often signal hidden moisture and potential mold growth. During or after rain, listen carefully for dripping sounds – that persistent “drip, drip, drip” that confirms water is actively finding its way inside.
Once you’re in the attic, check your insulation. Damp insulation that feels wet, looks matted down, or has changed color is usually sitting directly below the leak source. Look for dark spots on roof sheathing too – these discolored areas on the underside of your roof decking are often your closest clues to the actual entry point.
Here’s the key detective trick: follow water trails uphill. If you spot water damage on a rafter, trace it up toward the roof peak. The highest point where you see damage is typically closest to where water is getting in. You might even notice white, chalky deposits on wood surfaces – those are salt marks left behind as water evaporates.
Locating the Leak on the Roof’s Exterior
Armed with your indoor detective work, it’s time to inspect the exterior. Most roof leaks repair projects start with identifying vulnerable spots where water typically finds its way in.
Damaged or missing shingles are the most straightforward culprits – high winds, hail, or just plain old age can lift, crack, or completely remove shingles, leaving your underlayment exposed. But the real troublemakers are usually the spots where different materials meet.
Cracked flashing around chimneys, vents, and skylights is responsible for a huge percentage of leaks. This metal or plastic material seals joints and penetrations, but it can rust, loosen, or get damaged over time. Worn sealant around these same areas breaks down from UV exposure and temperature changes, creating perfect entry points for water.
Don’t overlook your clogged gutters either. When gutters can’t drain properly, water backs up under shingles or overflows onto walls and fascia boards. Damaged vent boots – those rubber seals around plumbing pipes – crack and degrade from sun exposure, making them surprisingly common leak sources.
Start your exterior inspection with binoculars from the ground if possible. If you can’t spot obvious damage and suspect an active leak, try the “water test” – have someone watch from the attic while you systematically spray sections of the roof with a garden hose, starting low and working upward. This methodical approach helps pinpoint exactly where water is sneaking in. For more detailed guidance on this detective work, check out this guide to finding roof leaks.
Safety First: Precautions for Working on Your Roof
Before we attempt any inspection or repair, safety must be our top priority. Working at heights is inherently dangerous, and a wet roof is especially hazardous. I can’t stress this enough – no roof leaks repair is worth risking your life or serious injury.
Think of it this way: a small leak might cost a few hundred dollars to fix professionally, but a fall from your roof could cost you thousands in medical bills, not to mention the pain and recovery time. We always emphasize that a DIY job is only worth it if it’s done safely. If you’re uncomfortable with heights, the steepness of your roof, or the weather conditions, please don’t hesitate to call professional roofers for help – we’re here to keep you safe and dry!
Essential Safety Gear and Practices

Here are the critical safety measures we always follow, and strongly recommend you adopt for any roof work:
Working on a dry, clear day is absolutely non-negotiable. A wet or icy roof becomes incredibly slippery and exponentially increases your risk of falling. Even morning dew can make shingles treacherous. Strong winds can also make working on a roof dangerous by affecting your balance or blowing debris around. We always choose a day with calm, warm weather – ideally above 50 degrees Fahrenheit – for any roof work.
Using a sturdy, properly-placed ladder forms the foundation of roof safety. Your ladder should be in excellent condition, extend at least three feet above the roofline, and sit on stable, level ground. The angle matters too – position the base one foot away from the wall for every four feet of height. A wobbly ladder is an accident waiting to happen.
Maintaining three points of contact when climbing means always keeping two hands and one foot, or two feet and one hand, touching the ladder. This simple rule has prevented countless falls over the years.
Working with a partner isn’t just helpful – it’s essential. Never attempt roof work alone. Your assistant can steady the ladder, pass tools up to you, and most importantly, call for help if something goes wrong. They’re also invaluable during water testing, watching from inside the attic while you spray sections of the roof.
Wearing soft-soled boots makes a huge difference in traction. Regular shoes can slip easily on shingles, especially when they’re slightly damp from morning dew. Boots with soft, rubber soles grip much better and give you confidence while moving around.
The right safety equipment can literally save your life. A breathing mask becomes essential when dealing with mold or old insulation in the attic. Hearing and eye protection matter when using power tools or clearing debris. Good gloves protect your hands from rough surfaces, sharp metal edges, and roofing chemicals.
For steep roofs, a Personal Fall Arrest System is absolutely essential. This system includes a harness that fits snugly around your body, a lanyard that connects you to an anchor point, and that anchor point must be securely attached to the roof structure – not just the shingles or gutters. This system can literally save your life if you slip. Setting up a proper Personal Fall Arrest System requires specific knowledge and equipment.
Before starting any repair, clear your work area of debris, leaves, or loose materials. This simple step improves visibility and eliminates tripping hazards that could cause you to lose your footing.
A roof leaks repair isn’t worth risking your safety. If the job feels too big, too complex, or too dangerous for your skill level, that’s exactly when professionals like us should step in. There’s no shame in calling for help – there’s only wisdom in knowing your limits.
A Homeowner’s Guide to Minor Roof Leaks Repair
For small, accessible leaks, a DIY approach can be both a temporary lifesaver and a permanent solution. Think of it as putting a band-aid on a scraped knee – sometimes that’s all you need! This is where we roll up our sleeves and tackle those common culprits before they turn into wallet-draining disasters.
Now, I want to be crystal clear here: we’re talking about minor issues only. If you’re looking at widespread damage or multiple problem areas, it’s time to call professional roofing contractors in Sugar Land who can handle the big stuff safely and effectively.
How to Perform a DIY roof leaks repair for Shingles and Small Holes
The good news? These are often the most straightforward roof leaks repair jobs you can tackle yourself, typically costing just $10 to $120 in materials. It’s like being your own roof doctor for minor scrapes and bruises.
Replacing curled or cracked shingles is probably the most common repair homeowners face. Start by gently lifting the shingle directly above the damaged one with a pry bar – think of it as carefully peeling back a sticker without tearing it. If the damaged shingle is cracked or beyond saving, pull out the nails holding it and slide that troublemaker right out.
Clean away any old roofing cement or debris (nobody likes working on a messy surface), then slide your new shingle into place like you’re completing a puzzle piece. Make sure it lines up perfectly with its neighbors – shingles are surprisingly social and work best when they’re aligned properly.
Lift that upper shingle again and drive two roofing nails through the top corners of your new shingle, making sure they bite into the roof deck below. Finish with a small dab of roofing cement over those nail heads, then press the upper shingle back down. For more detailed guidance on this process, check out our comprehensive guide on how to repair roof shingles.
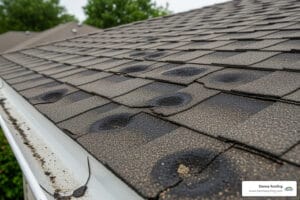
Sealing small nail holes might seem like no big deal, but these little troublemakers (called “nail pops”) can cause surprisingly persistent leaks. They happen when nails back out due to the roof’s natural expansion and contraction – it’s like the roof is doing tiny stretches all year long.
Gently lift the shingle to expose the popped nail. If it’s really backed out, pull it completely. If it’s just being rebellious and slightly raised, tap it back down until it’s flush. Either way, apply a generous dab of high-quality roofing cement over the spot. For extra protection, slip a small piece of metal flashing underneath the shingle, centered over the hole, and secure it with roofing cement. This creates a double layer of defense that water simply can’t penetrate.
Applying patches works great for small punctures or worn spots that aren’t quite big enough to warrant a full shingle replacement. Clean the area thoroughly (water and repairs don’t mix well), then spread roofing cement over the damage, extending a few inches beyond the problem area. Cut a piece of fiberglass mesh or roofing felt slightly larger than the damaged spot and press it firmly into the cement. Top it off with another layer of roofing cement for complete coverage.
Here’s a pro tip from my years in the business: while caulk might seem like the quick-and-easy solution, resist the temptation for anything bigger than tiny pinholes. Mechanical fixes – actually replacing or properly repairing components – always beat temporary patches in the long run.
Fixing Leaks Around Vents, Pipes, and Flashing
These areas are like the weak spots in a castle wall – they’re necessary openings, but they need extra attention to keep the water out. Most roof leaks repair calls I get involve these penetrations because they’re constantly battling the elements.

Replacing cracked pipe boots is probably the most common repair I see, especially on plumbing vents. That rubber gasket around the pipe boot takes a beating from UV rays and temperature swings – it’s like leaving a rubber band on your dashboard for years.
Start by inspecting the boot for cracks in the base or tears in the rubber gasket. If you find damage, carefully pry up the surrounding shingles and cut away any old sealant with a utility knife. Remove the old nails and slide that worn-out boot right out of there.
Installing the new boot requires a bit of layering finesse. The bottom flange sits over the shingle below it, while the sides and top flange tuck under the shingles above and to the sides. It’s like a carefully choreographed dance of overlapping materials. Secure it with roofing nails through the flanges, then apply a bead of high-quality silicone caulk around the pipe base and over any exposed nail heads.
Re-caulking vent flashing is often all that’s needed for other types of roof penetrations. Scrape away all the old, cracked caulk – and I mean all of it, even the stubborn bits that want to hang on. Apply a generous, continuous bead of exterior-grade silicone caulk around the vent base and any seams. Smooth it with a wet finger for a professional finish that would make any roofer proud.
Repairing step flashing around chimneys and walls gets a bit more complex, but it’s still manageable for the determined DIYer. Step flashing consists of L-shaped metal pieces that create a watertight seal where your roof meets vertical surfaces. When these pieces rust, bend, or go missing, water finds its way in faster than you can say “leak.”
Carefully remove damaged flashing pieces by lifting adjacent shingles and loosening any covering materials. Clean the area thoroughly, then install new step flashing pieces, ensuring each one overlaps the shingle below and extends up the wall. Each piece gets secured with a nail at its top corner, hidden under the shingle above. Seal the top edge where the flashing meets the wall, and you’ve created a barrier that will keep water flowing where it belongs – away from your home.
For professional repairs, expect to pay around $250-$550 for a failed pipe boot or $500+ for chimney flashing issues. But with these DIY techniques, you can often solve the problem for a fraction of that cost while gaining the satisfaction of fixing it yourself.
These techniques work great for minor, easily accessible problems. If you’re dealing with multiple leak sources, extensive damage, or a complex roof structure, that’s when it makes sense to call in experienced professionals who can tackle the bigger challenges safely and effectively.
When to Call a Professional for Roof Leaks Repair
While DIY fixes can handle minor issues, there’s a fine line between being handy and being in over your head. I’ve seen too many homeowners turn a $300 repair into a $3,000 nightmare by attempting fixes beyond their skill level. Knowing when to call a professional isn’t admitting defeat – it’s making a smart financial decision that protects both your safety and your wallet.
Signs You Need an Expert
Sometimes the roof itself is practically screaming for professional help, and ignoring these warning signs can lead to serious consequences. Let me walk you through the situations where picking up the phone is your best move.
Widespread damage across multiple areas of your roof signals a systemic problem that requires expert diagnosis. When you’re seeing water stains in several rooms or extensive shingle damage, this isn’t a patch-and-pray situation. It’s likely pointing to issues with your roof’s underlying structure or age-related deterioration that needs comprehensive attention.
Leaks you can’t locate are perhaps the most frustrating type of problem. Water has an annoying habit of traveling along rafters, pipes, and other pathways before making its grand entrance into your living space. Professional roofers have specialized moisture detection equipment and years of experience tracking down these elusive leaks. What might take you hours of guesswork, they can often identify in minutes.
When structural rot is visible on rafters, trusses, or roof decking, you’re dealing with a safety issue that goes far beyond a simple leak. This type of damage compromises your home’s structural integrity and requires immediate professional assessment. The leak has likely been active for months or years, and attempting repairs without addressing the underlying structural damage is like putting a band-aid on a broken bone.
Steep or high roofs present serious safety hazards that professional roofers are trained and equipped to handle. If your roof has a steep pitch that makes walking difficult, or if you’re dealing with a multi-story home, leave it to the experts who have proper safety harnesses, scaffolding, and insurance coverage. A hospital bill will cost far more than a professional repair.
Sometimes a single leak indicates a larger underlying problem with your roof system. If you find yourself constantly patching small issues, it might be more cost-effective to address the root cause. Professional roofers can determine whether you’re dealing with isolated damage or widespread deterioration that requires more comprehensive solutions.
Emergency situations demand immediate professional intervention. After severe storms, you might need emergency roof repair and tarping services to prevent further water damage while permanent repairs are planned. These situations require quick response and specialized equipment that only professional crews can provide.
Understanding Professional Repair Costs
Roof leaks repair costs vary significantly based on the complexity and extent of the damage. While most minor professional repairs fall between $150 and $1,500, major structural issues can easily push costs beyond $3,000. Understanding these price ranges helps you budget appropriately and recognize when quotes seem unreasonable.
Here’s what you can expect for common roof leaks repair scenarios:
| Type of Repair | Average Cost Range |
|---|---|
| Nail pops (5-10 repairs) | $325 – $500 |
| Failed pipe boot replacement | $250 – $550 |
| Missing shingles (up to 5) | $200 – $500 |
| Chimney flashing repair | $500+ |
Several factors significantly influence your final repair bill. Roofing material type plays a major role – asphalt shingles are generally the most affordable to repair, while tile, metal, or slate roofs require specialized skills and tools that increase labor costs.
Roof complexity directly impacts pricing as well. A simple, single-plane roof allows for quick, efficient repairs, while complex rooflines with multiple angles, dormers, or architectural features require more time and careful attention to detail.
The extent of damage is perhaps the biggest cost driver. A small, isolated leak with minimal water damage costs far less than widespread issues that have caused interior damage, mold growth, or structural rot. Early intervention almost always saves money in the long run.
Accessibility challenges such as steep pitches, extreme heights, or hard-to-reach locations increase labor time and may require special equipment like scaffolding or aerial lifts. These factors naturally drive up the overall cost but are necessary for safe, quality work.
For a more detailed breakdown of potential costs for your specific situation, check out our comprehensive guide: Learn what it might cost to fix your roof leak.
Choosing an experienced local contractor ensures you’re getting quality workmanship backed by proper insurance and warranties. The cheapest quote isn’t always the best value when it comes to protecting your home’s most important barrier against the elements.
Conclusion: Protecting Your Home with Proactive Roof Maintenance
Fixing an active roof leak is a reactive, often stressful, necessity. However, the best strategy for long-term peace of mind is proactive, preventative maintenance. This approach not only extends the life of your roof but also protects your entire home from the cascading damage that water can cause. Think of your roof as the ultimate shield for your most valuable asset; a little consistent care ensures it remains strong and impenetrable.
The simple truth is that most costly roof leaks repair jobs are entirely preventable. Just as you wouldn’t neglect oil changes for your car and expect it to run forever, your roof requires regular attention to perform its critical function. Over the years, we’ve seen countless Houston-area homeowners save thousands of dollars and avoid major disruptions simply by adopting a routine maintenance mindset and catching small issues before they escalate.
To empower you to protect your investment, here is a comprehensive checklist for preventative roof maintenance:
-
Schedule Annual Professional Inspections: This is your first and most important line of defense. We recommend a professional roof inspection at least once a year, ideally in the fall before the winter weather or in the spring. A trained expert can spot subtle signs of wear and tear that an untrained eye might miss, such as granule loss on shingles, hairline cracks in flashing, or early signs of failing sealant. They can provide a detailed report and address minor issues on the spot before they become leaks.
-
Conduct Your Own Visual Checks (Safely): In between professional visits, especially after severe weather like hailstorms or high winds, conduct a safe inspection from the ground using binoculars. Look for anything that seems out of place: missing or crooked shingles, dark patches that might indicate moisture, or visible damage to flashing around chimneys and vents.
-
Keep Gutters and Downspouts Clear: This is one of the most critical maintenance tasks. Clogged gutters cause water to back up against the roofline. In winter, this can lead to destructive ice dams, where trapped water freezes and expands, forcing its way under shingles. Throughout the rest of the year, overflowing gutters can saturate fascia boards, leading to rot, and dump water directly against your home’s foundation. Cleaning your gutters thoroughly in the spring and fall is a non-negotiable task.
-
Trim Overhanging Tree Branches: Trees are beautiful, but their proximity to your roof can be a problem. Overhanging branches can scrape against shingles, wearing away their protective granular surface with every gust of wind. They also drop leaves and twigs that clog gutters and can provide a bridge for pests like squirrels and raccoons to access your roof. Worse, a heavy branch can break during a storm, causing significant structural damage. Keep all branches trimmed at least three to five feet away from your roofline.
-
Inspect Sealants and Flashing: The points where your roof is penetrated by pipes, vents, or chimneys are sealed with flashing and caulk. These seals are constantly exposed to UV rays and temperature fluctuations, causing them to degrade, crack, and pull away over time. Every few years, check these areas for signs of deterioration. Reapplying a high-quality exterior-grade sealant is a simple, inexpensive fix that prevents some of the most common types of leaks.
-
Ensure Proper Attic Ventilation: A well-ventilated attic is crucial for a healthy roof system. A balanced system of intake (soffit) and exhaust (ridge) vents allows air to circulate, preventing extreme heat buildup in the summer and moisture condensation in the winter. Poor ventilation can cook your shingles from below, shortening their lifespan, and lead to condensation that mimics a roof leak, causing mold and rot in your attic.
If you find an issue during your inspection that’s beyond a simple fix, or if you’re facing an active leak, don’t hesitate to seek professional help. Attempting a complex DIY repair can lead to further damage, void material warranties, and pose significant safety risks. For homeowners in the Sugar Land and greater Houston area, the experienced team at Sienna Roofing offers reliable repairs, comprehensive maintenance plans, and a 100% satisfaction guarantee. We’re here to provide personalized, community-driven service, ensuring your roof protects your home for years to come. Contact us today to put an end to those pesky leaks and discuss a proactive maintenance plan for your home.